We are in the process of upgrading to the new Kinetic UI. We have a handful of “Print Options” screens that we have added Customization. I have recreated these customizations and updated the PROCESS Menu items. When the screen launches as a new window/app it shows the customization, however, when it opens as a fly out menu the Base layer is displayed. How do we get the fly out to show the customized layer?
Can you show me how you set up your app-open widget?
What app-open widget? We’re new to the app studio. All we have done so far is add the fields needed to the print screen and update the menu. Which is all we did for the old version has a step been added?
I may be misunderstanding.
Can you show me screenshots of your custom window, how you’re launching it (description is fine vs screenshot), and the menu maint setup?
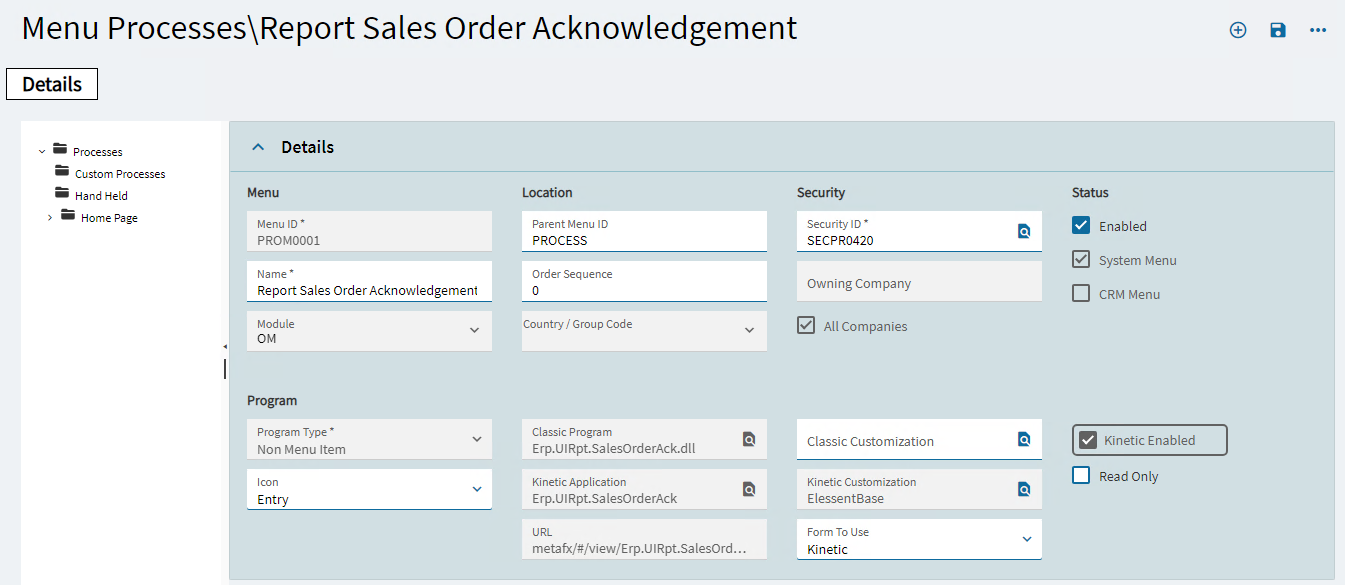
Menu Maintenance
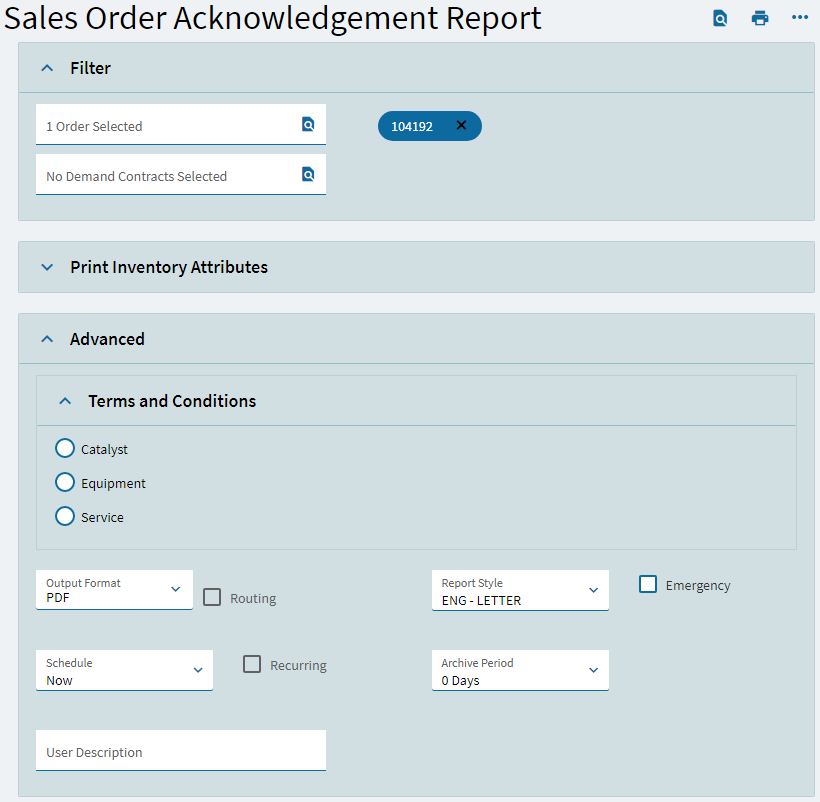
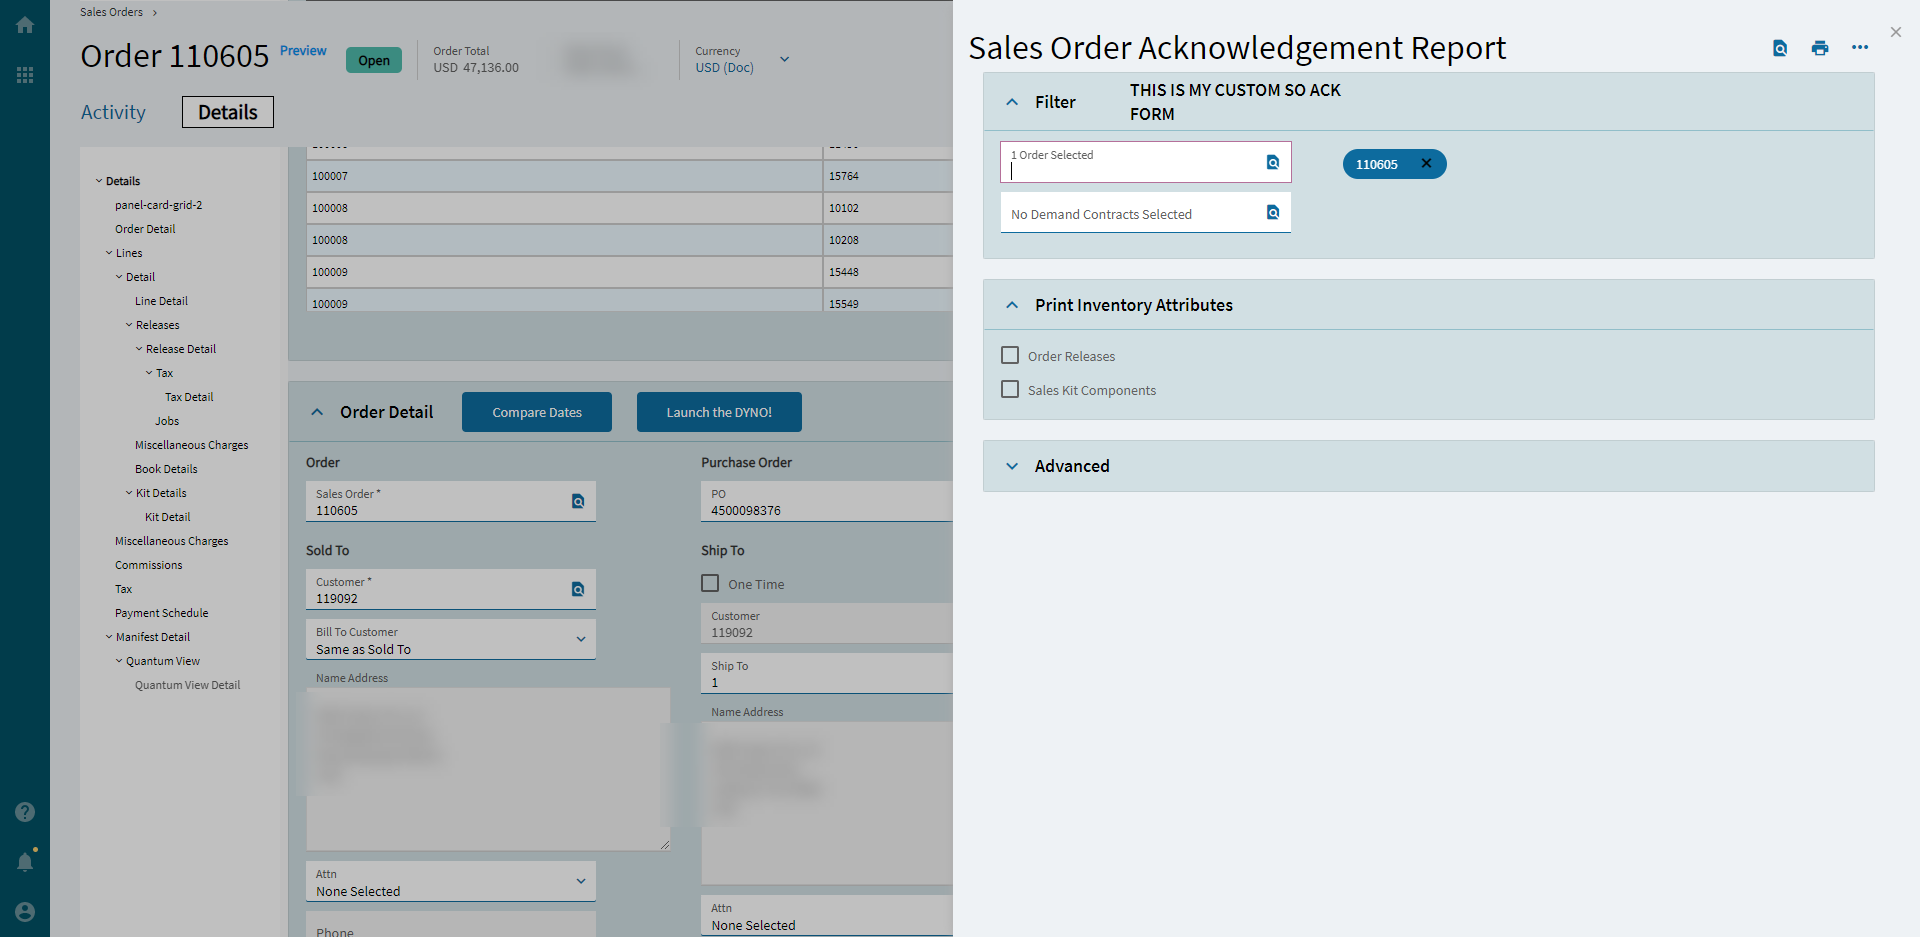
Customized Screen which opens when the print button is hit from a classic sales order screen prompting the launch of a new window:
When we try to print from the kinetic screen via the overflow menu we get the default print screen.
You’re not going to enjoy what comes next. ![]()
I’ll attempt to write some detailed steps for you.
- If you haven’t already, create or use your current layer for Order Entry.
- Go to the Details node
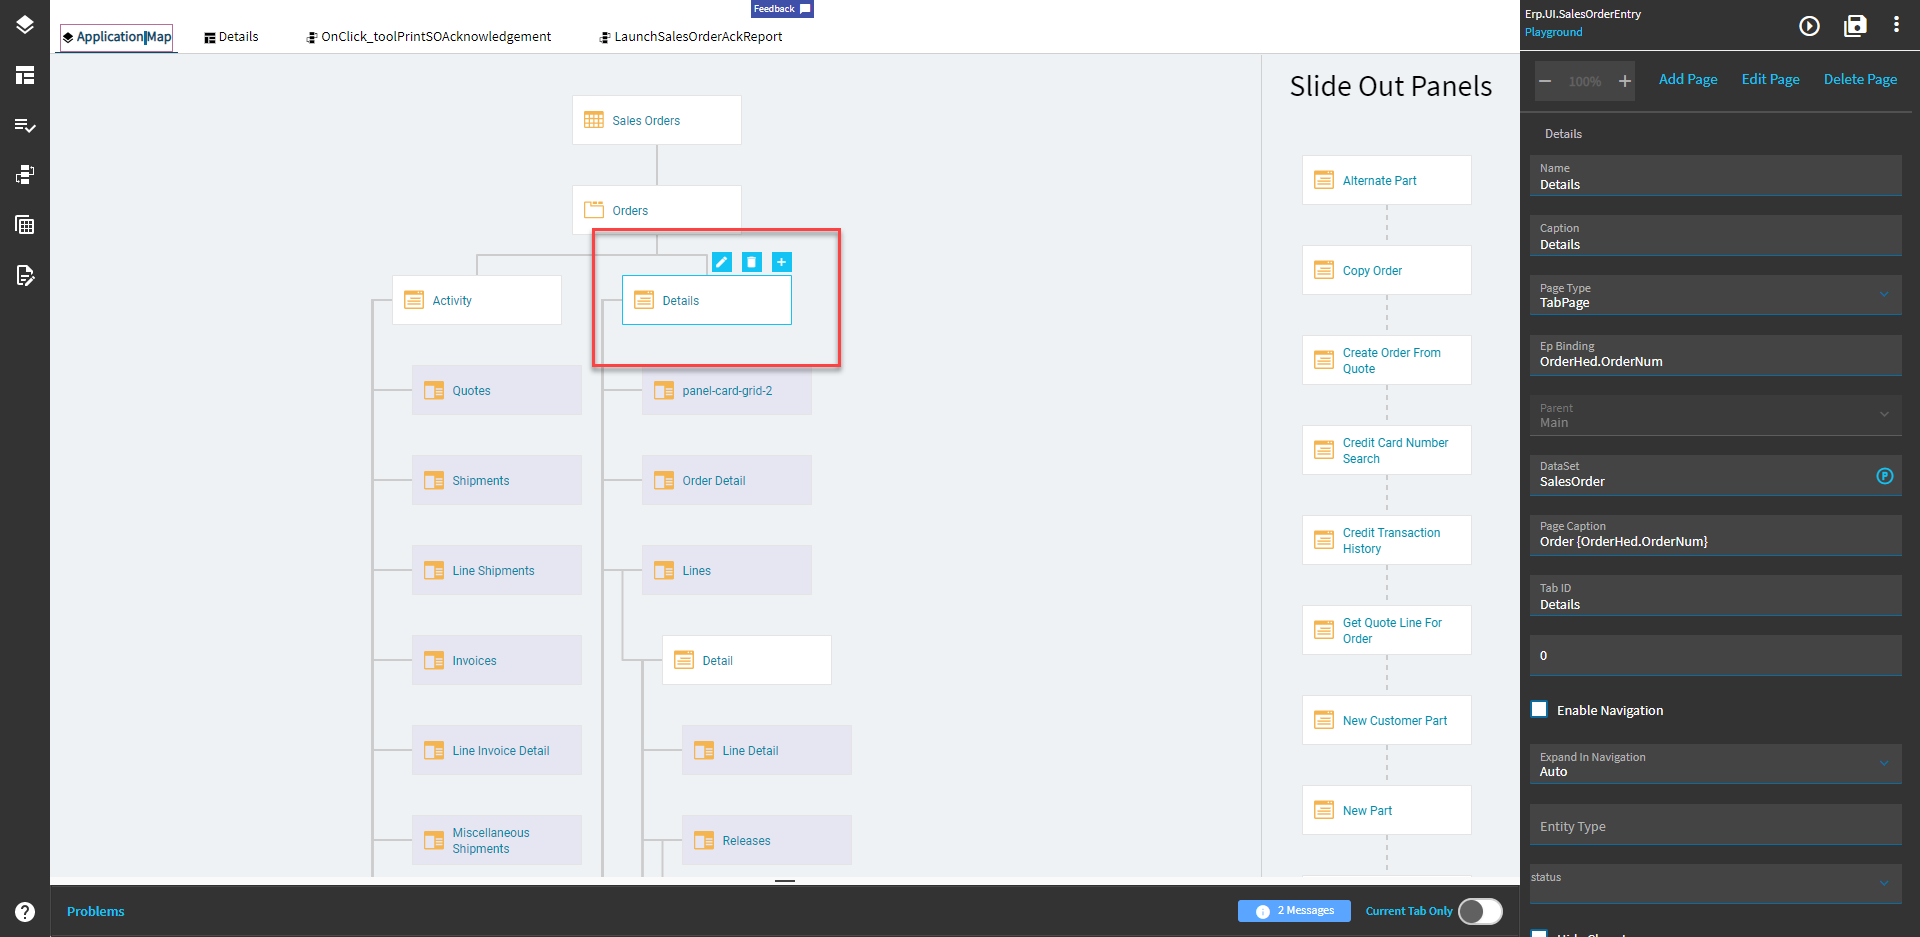
- Click this weird, empty space up here, go to properties, then scroll all the way down.
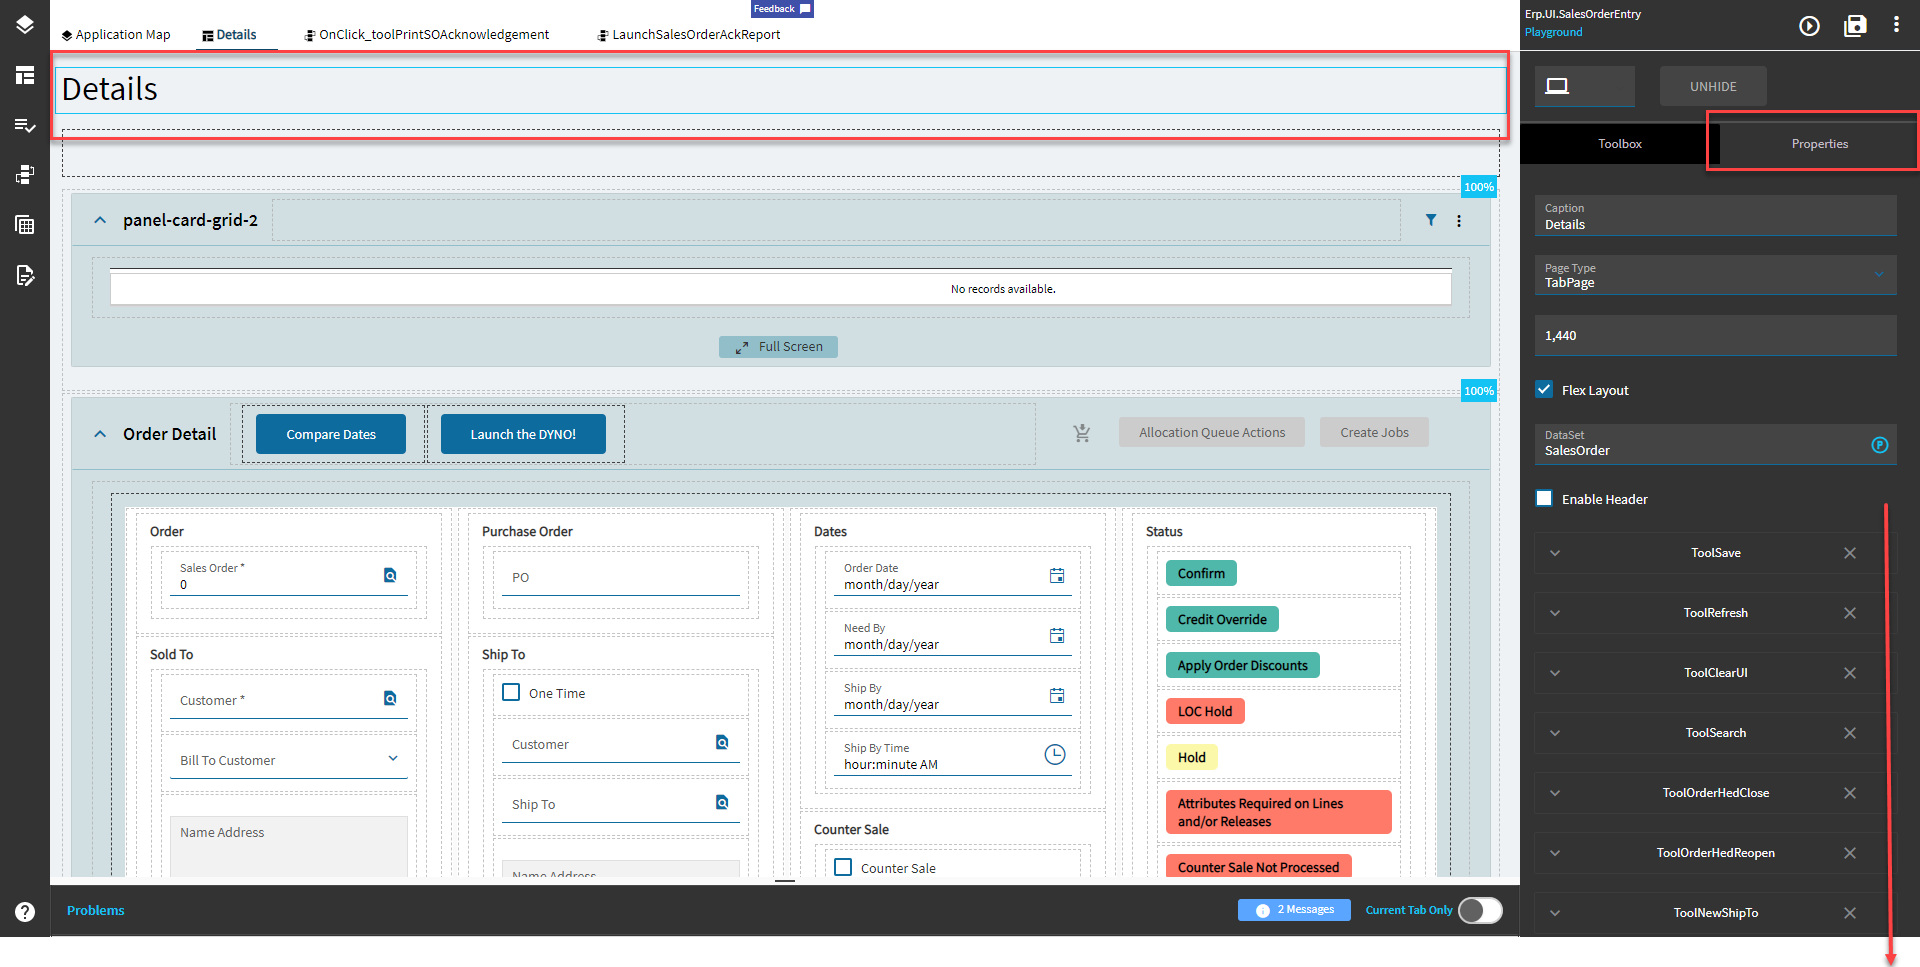
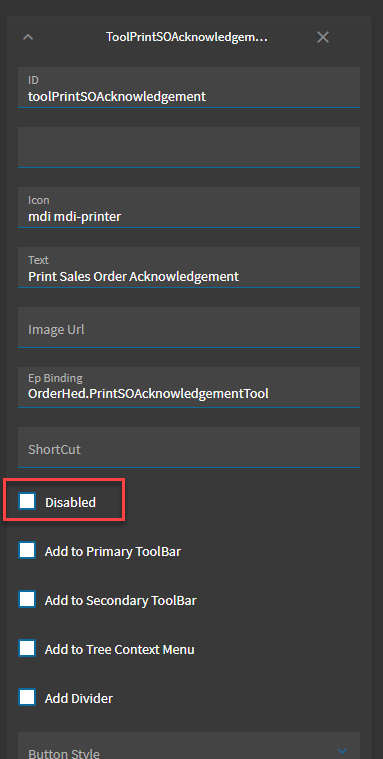
- Get rid of this tool (we’re going to make our own to replace it)
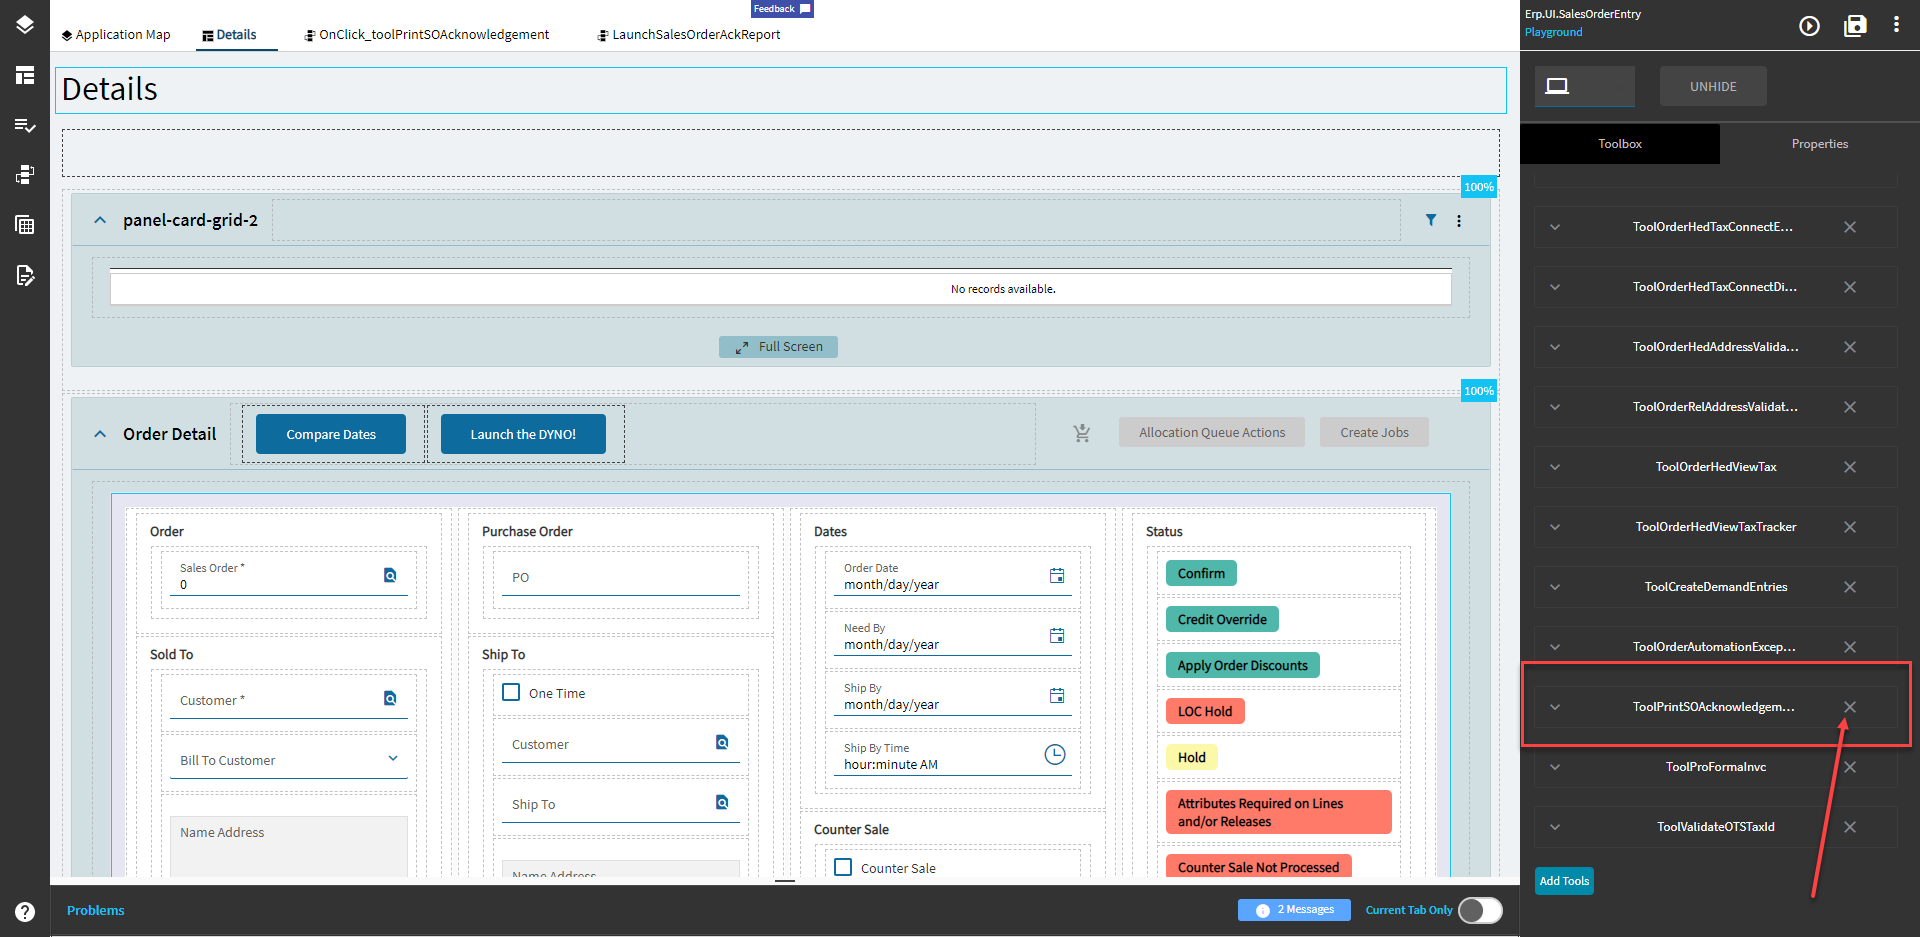
If that concerns you, you can disable it, just know there will be two (native disabled and the enabled one we create)
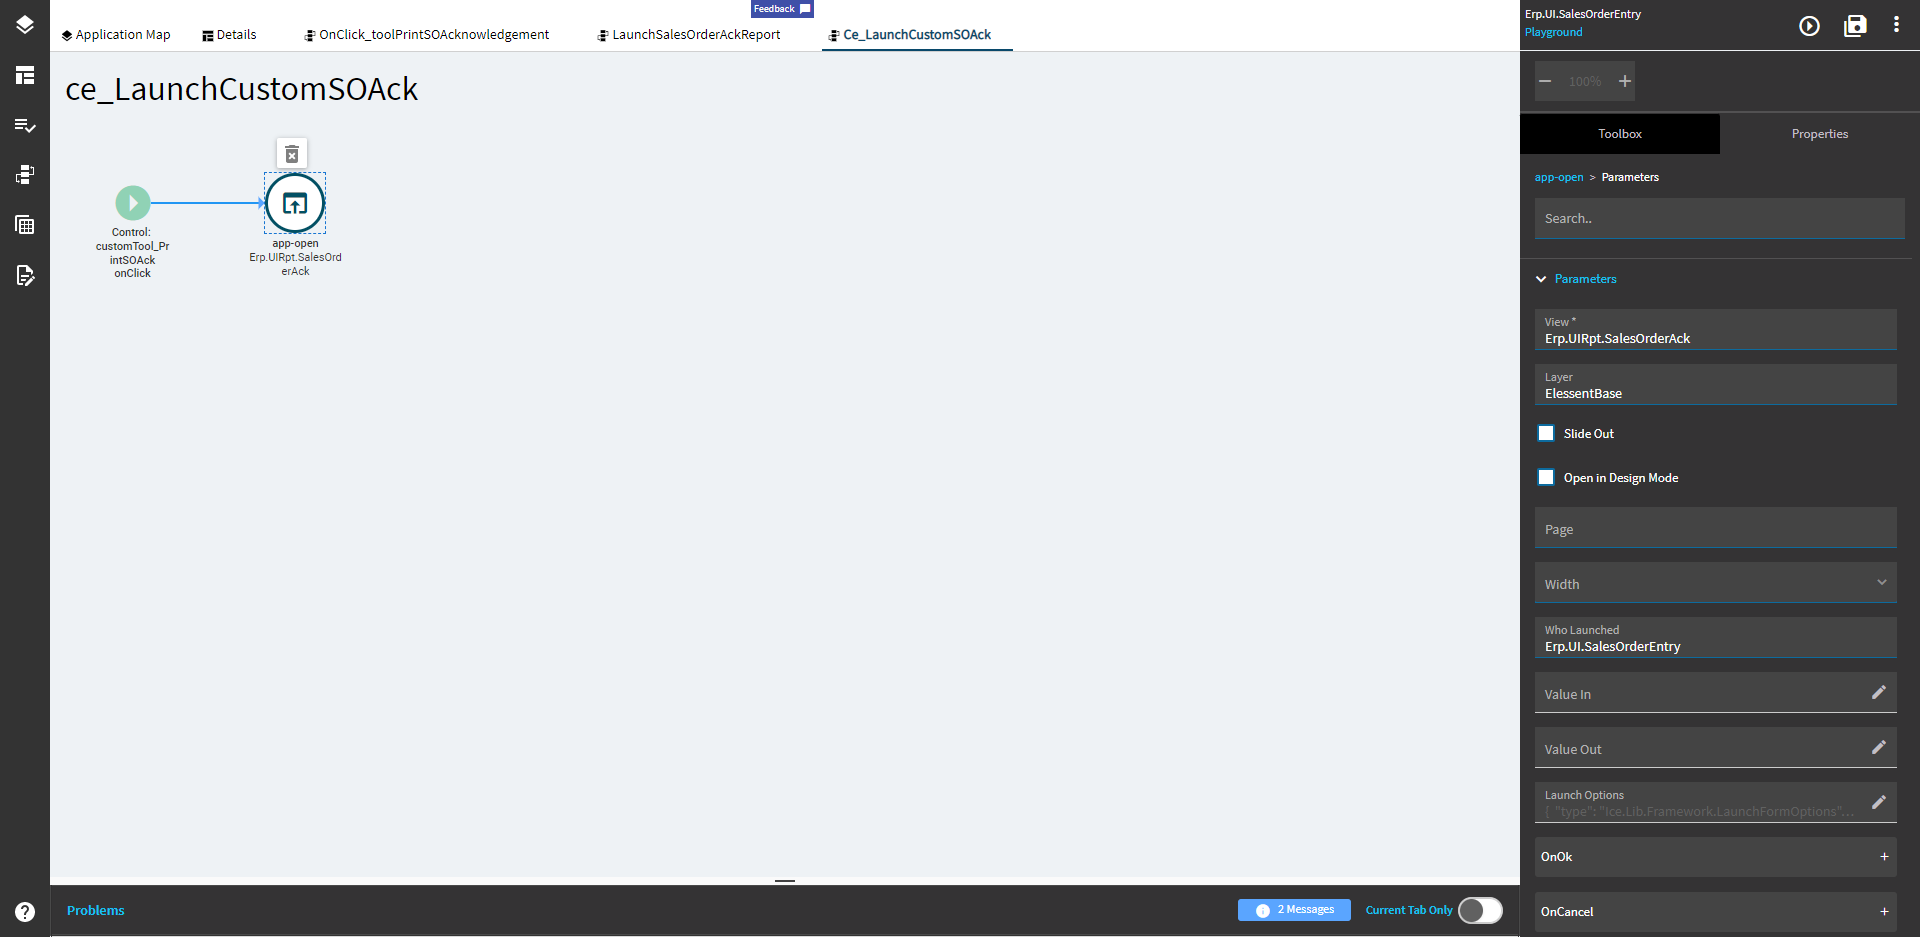
- Click Add Tool

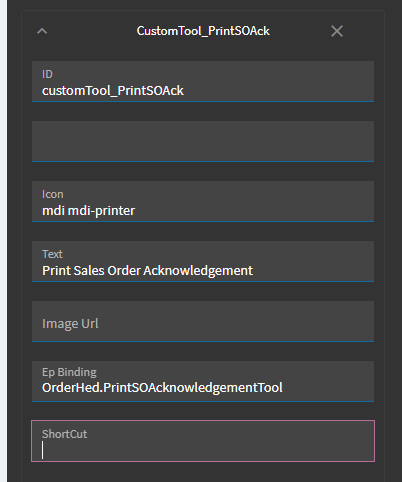
- Copy most of the info as such
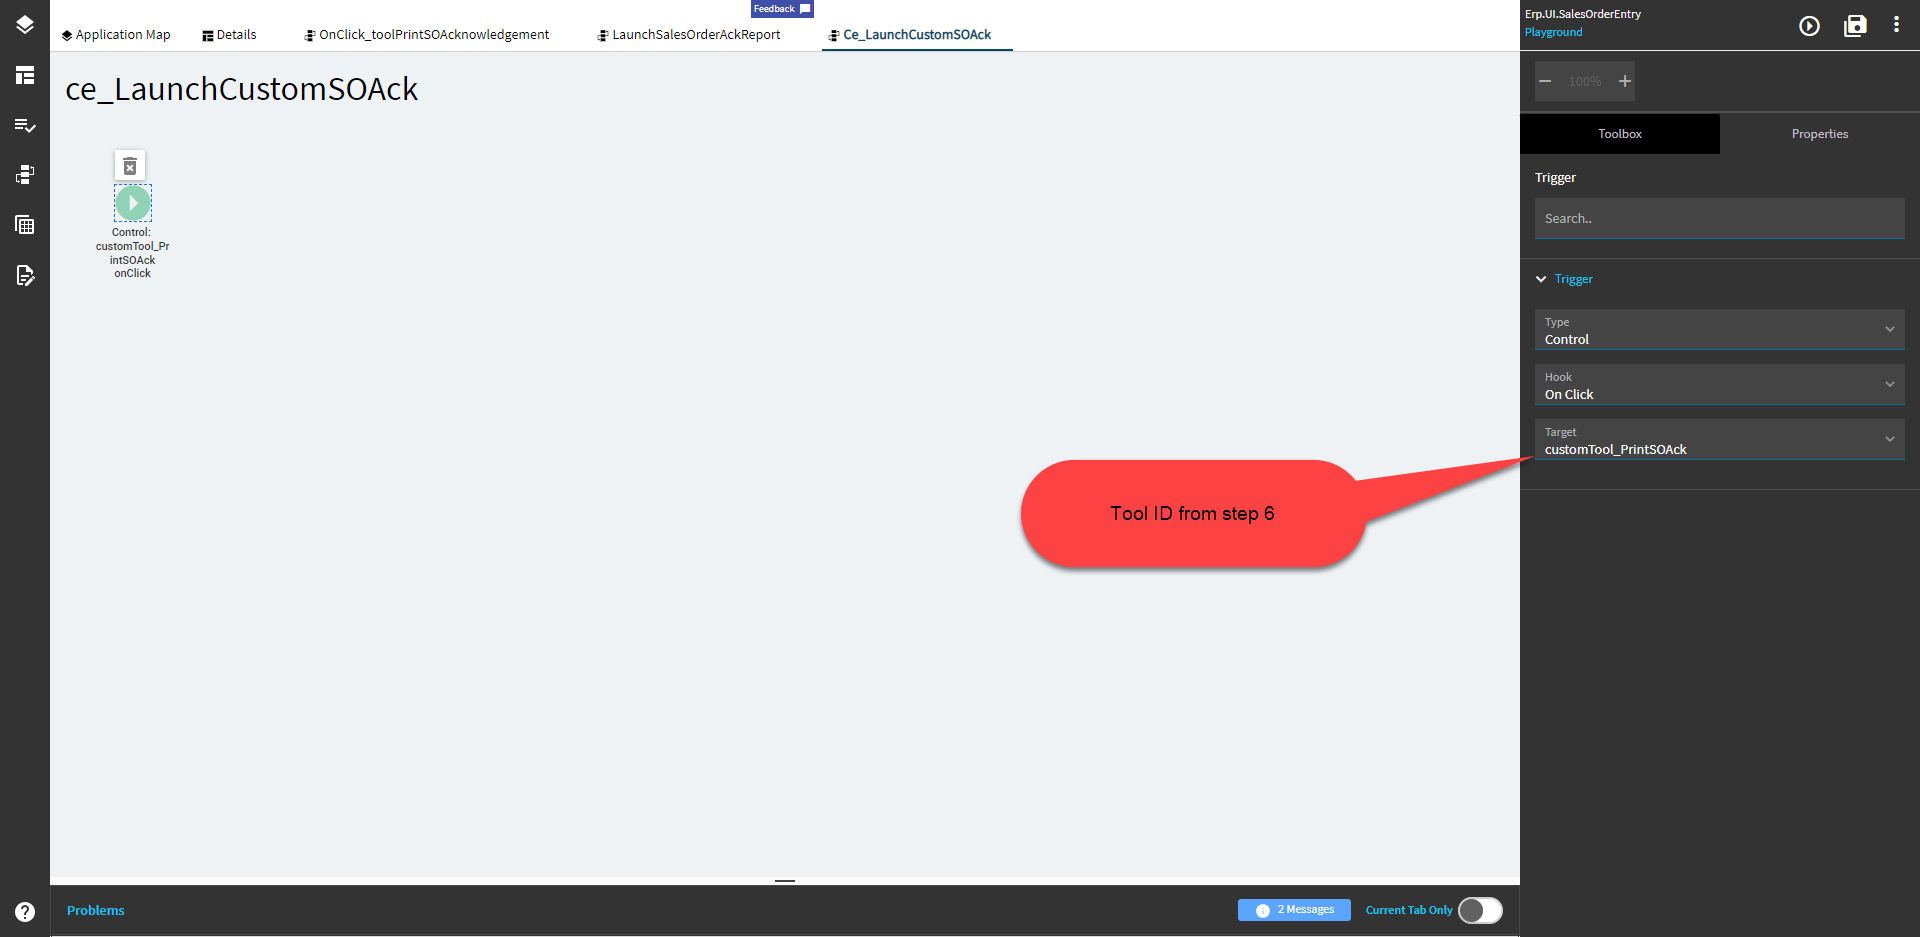
- Create a new event

- Set up the trigger to be Control > On Click > Your Control ID
- Add an App-Open widget and configure as follows:
The code within the Launch Options:
{
	"type": "Ice.Lib.Framework.LaunchFormOptions",
	"options": {
		"valueIn": "{OrderHed.OrderNum}",
		"showAsModal": true
	}
}
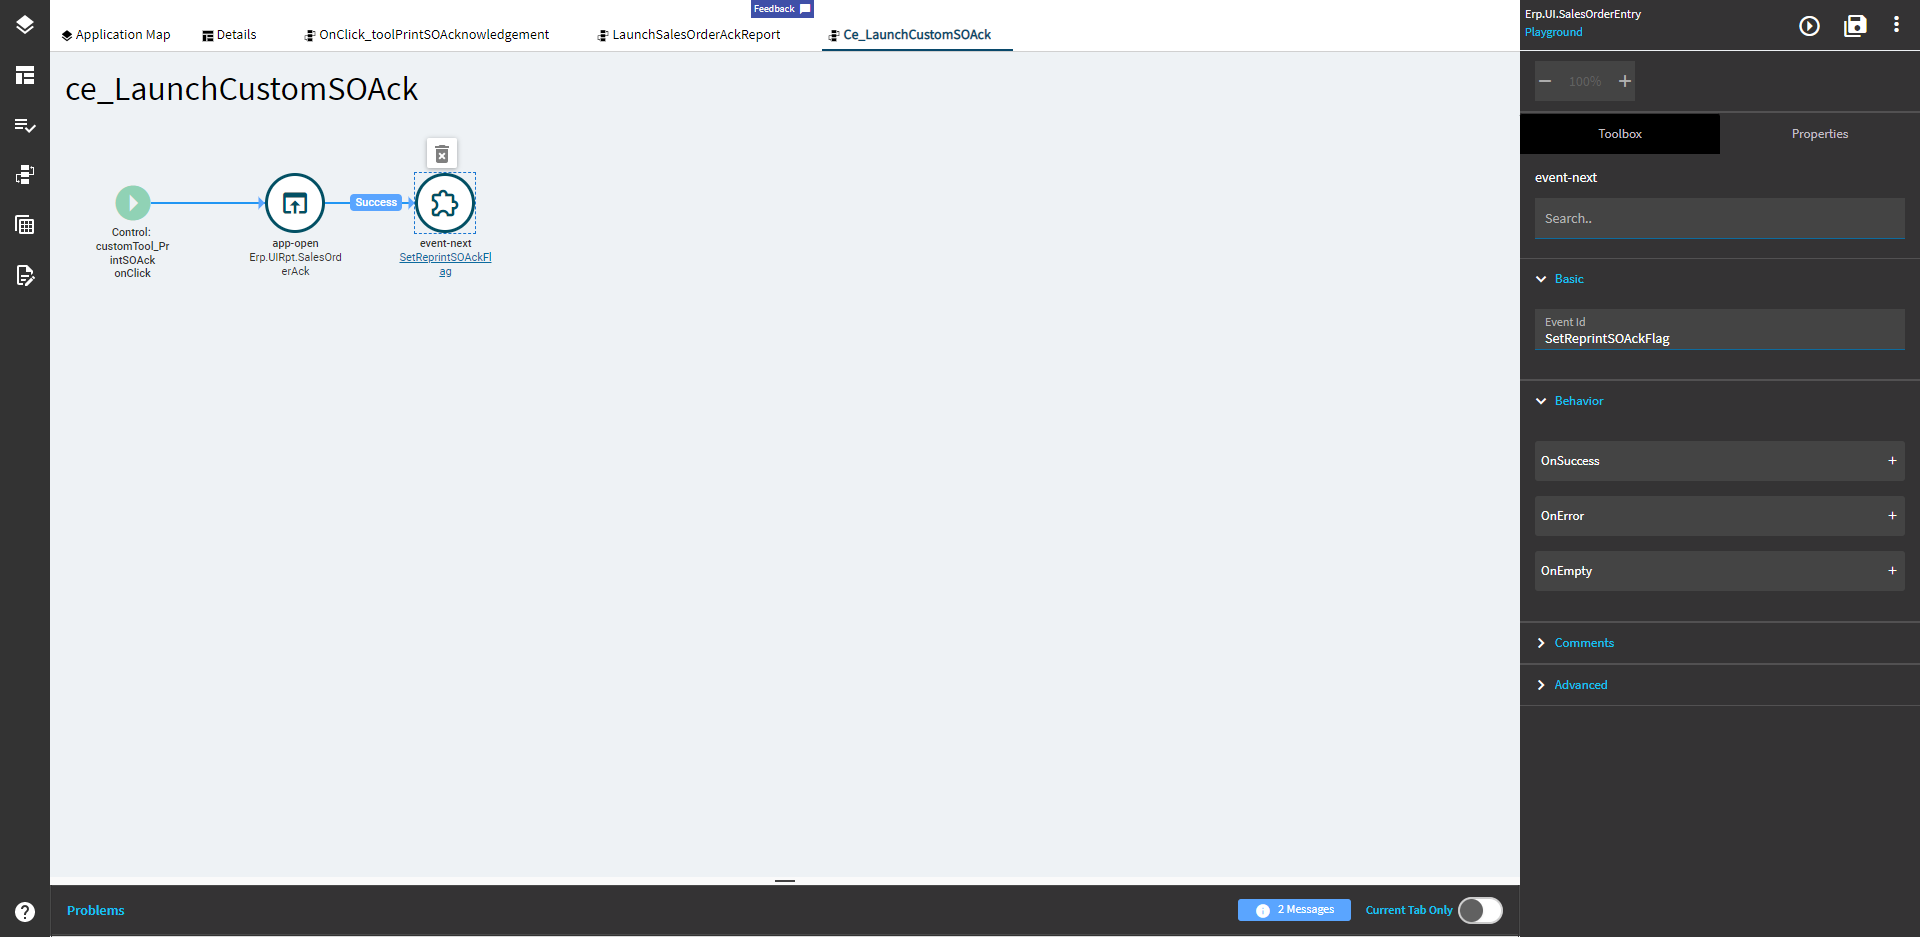
- In the properties of the app-open click Behavior > OnSuccess and add an event-next widget to finish out replicating the native event flow and set the Event Id to be “SetReprintSOAckFlag”
- Cross your fingers!
- I did not test this
- Good luck.

Couldn’t leave ya hanging. I ended up testing it. Lol
7 Likes
Thank you so much. I now have the screen customizations showing as they should!
Is there a manual anywhere for Application Studio. I have watched the Epicor Learning Center videos but they are not quite what I would hope for as reference material.


4 Likes
Well I’ll be back then. ![]()
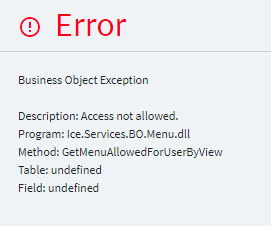
I think I fallowed the steps pretty will but I am getting this error. Any clues to what I did wrong? I am new to app studio and epicor kinetic.
