How To: Kinetic - Launch a Form using App Studio

Hey folks, just your friendly, neighborhood Kineticist. Yes, that’s a word now. I just made it.

I wanted to present a simple how to for how to launch another form from your current one.
This will start basic, but will add more advanced scenarios as I figure them out!

  1. Step one is to create an event for this to fire. In my example, I added a textbox bound to TransView.PartNum and a button with an OnClick event. Those are outside the scope of this How To, but feel free to reach out with questions regarding it.

  2. Next, you’re going to find the “App-Open” widget and drag it onto the pane.

  3. Open up Basic > Parameters

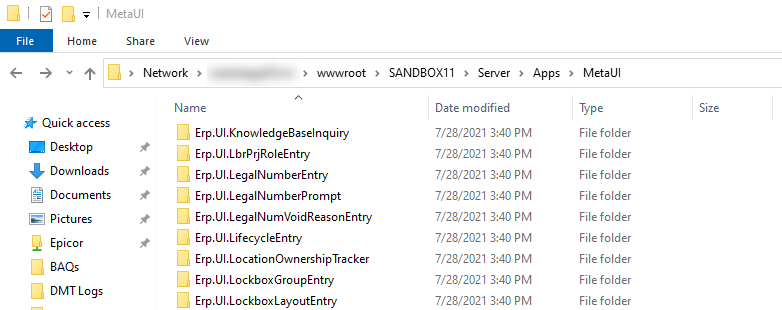
  4. Populate the “View”. This is the screen that you want to open. You enter the MetaUI folder name in this property. For example: Erp.UI.PartEntry. These can be found here:
    \\<YourServerName>\wwwroot\SANDBOX11\Server\Apps\MetaUI

image

  1. If you have a custom layer, enter the name of it in the “Layer” property, otherwise, leave it blank for the default.
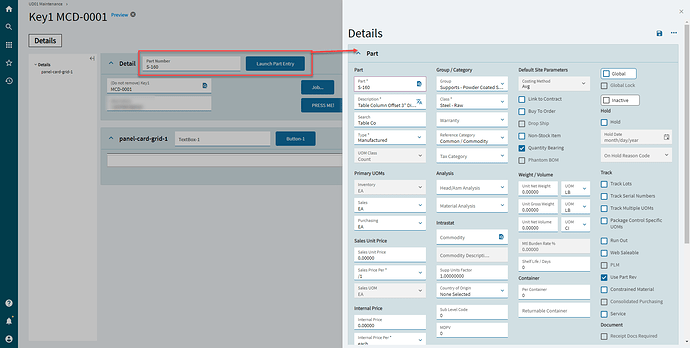
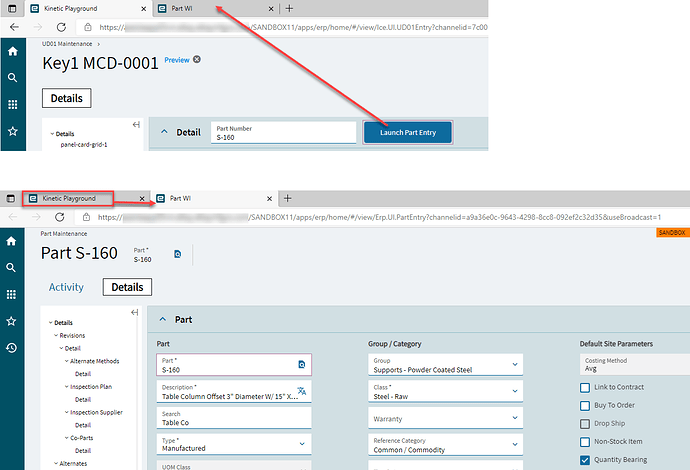
  2. Check the “Slide Out” box if you want the new form to open in a Slide Out Panel, otherwise it will open in a new tab.

Slide Out

New Tab

  1. Enter the Page you want to land to. You can find these in the Application Map > Name property. I set mine to “Details” to take me right into the record and skip the landing page.

image

  1. Fill in the “Who Launched” with the application you’re currently in. Again, this is the MetaUI folder name. Mine is originating from UD01.

image

Here’s where there’s more room for exploration. So far, what I have found to work is as follows:

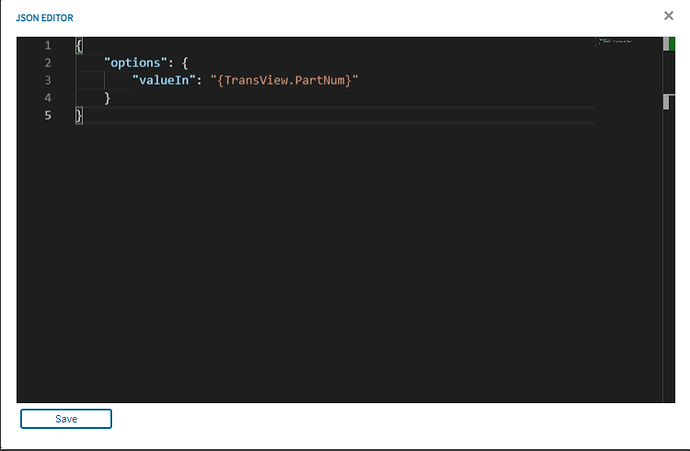
  1. Edit the Launch Options. Enter the following JSON, but modify to your needs. Recall back to me saying that I bound my text box to TransView, so here I’m binding “valueIn” to “{TransView.PartNum}”.

image

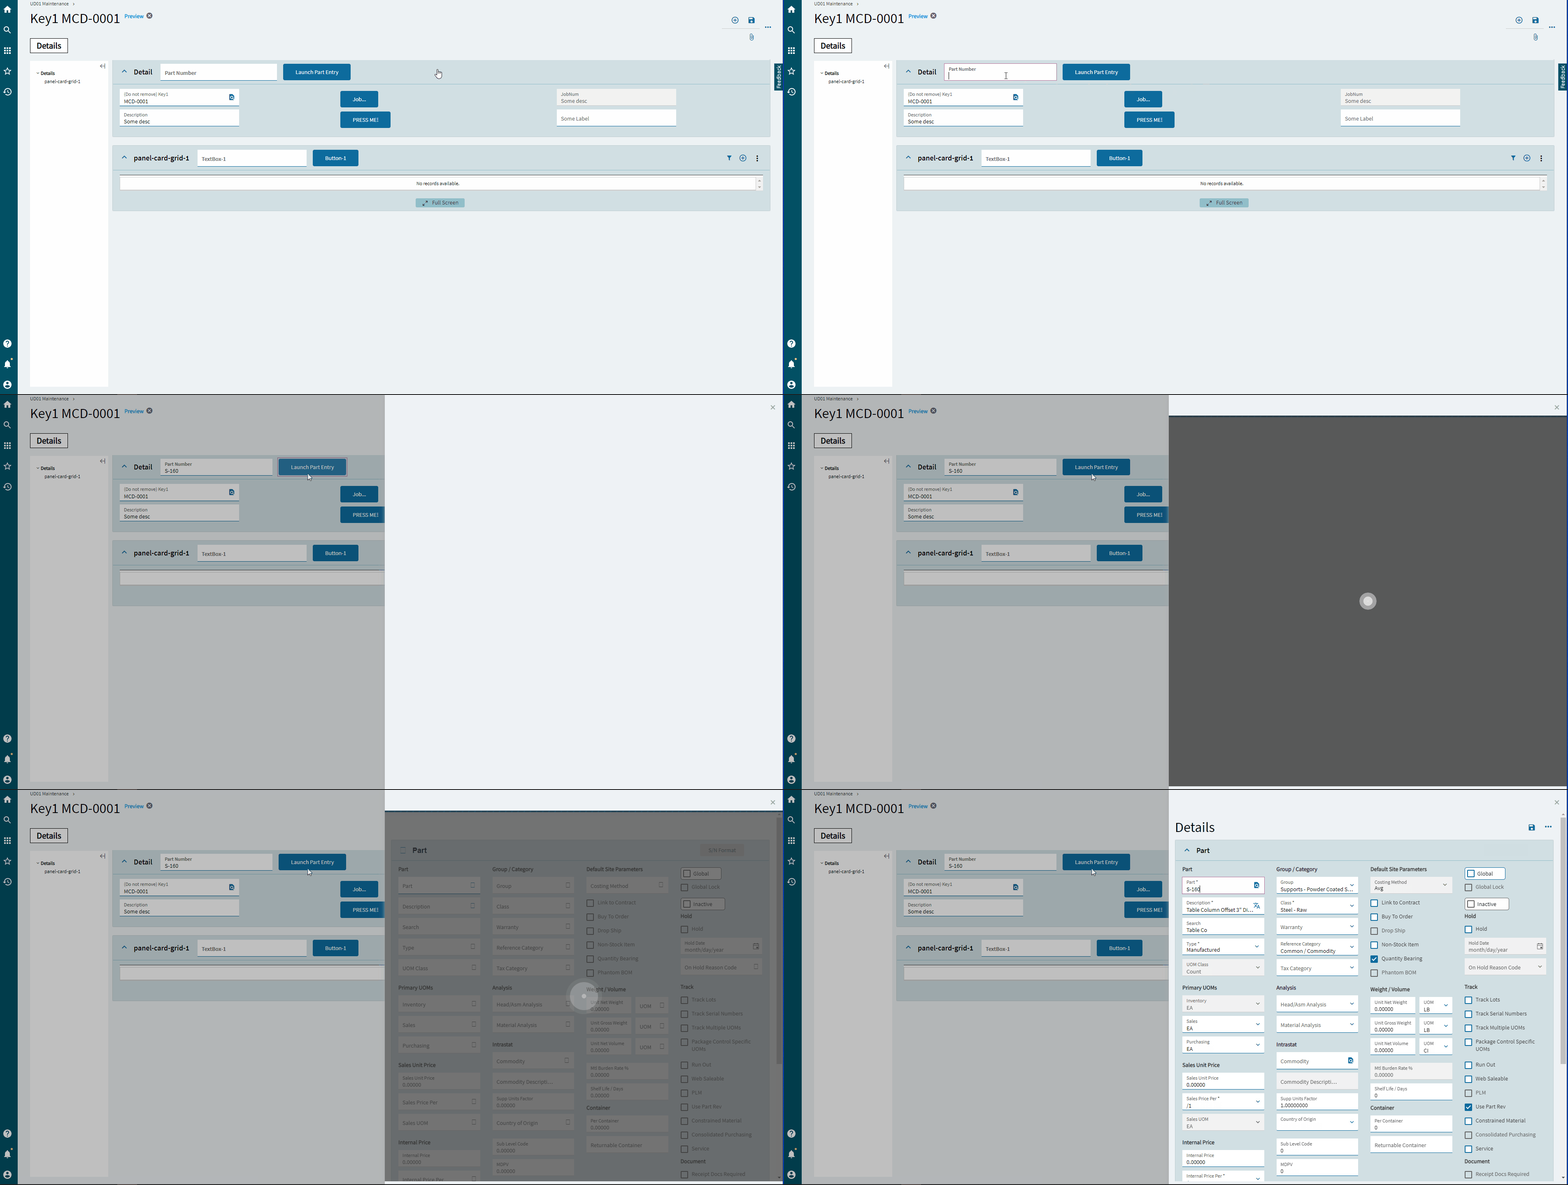
Here’s the final product:
App-Open

Update – Callbacks

19 Likes

Keep it coming buddy! Nicely done.

#MovedToExpertsCorner

3 Likes

Not to burst your linguistic creativity bubble, but “kineticist” already exists:

ki·​net·​i·​cist | \ kə-ˈne-tə-sist also kī- \

Definition of kineticist

1**:** a specialist in kinetics

2**:** a person who works in kinetic art : KINETIC ARTIST

First Known Use of kineticist

1960, in the meaning defined at sense 1

1 Like

Well shoot.
Consider my bubble burst, Mr. Lowell!

There–I made a new definition. :stuck_out_tongue: #3

Definition of kineticist

1**:** a specialist in kinetics

2**:** a person who works in kinetic art : KINETIC ARTIST

3**.** a person who struggle buses their way through App Studio to make the lives of others easier.

6 Likes

and @hmwillett for the win!

1 Like

Sorry to bump this. In step 4 you specify the specific form you want to open. Is there any way to specify whether this form will open as classic or kinetic?

1 Like

With the launch options, I don’t believe so.
If it’s in the browser, obviously it will be the new UX.
If you’re using the client, I imagine it will follow the rules of how you have “Form To Use” set from either Menu Maintenance or the user’s preferences.

1 Like

Thanks for this tutorial.

1 Like

Of course!

1 Like

Thanks for this write-up Hannah. It was great, but I’m a little stuck on the LaunchOptions. I’m trying to open Customer-Contact page. It opens up fine when I give in the CustomerID in “valueIn”, but with the first found Contact number. Do you know how I can send in the Contact Number along with Customer ID?

1 Like

Give this a shot. It uses contextValue to send extra information.

2 Likes

I did send in the extra info using the contextValue. But cant figure out where to actually set that value in? Like if I use a row-update and use this value (like Contact.Name = ‘XYZ’) then it opens up the default contact and updates the name on it.
I’m looking to actually open the Contact that I need on the slide out. Can row-current-set be used? If, so how does that work?

2 Likes

Run. Run far away from this. :rofl:
There are soooo many issues.

First of all–if you’re using the slide out panel, it doesn’t actually send the contextValues. Neat. :expressionless: If you’re going that route, they’re gonna have to select the proper contact themselves, but at least it gets them to the correct customer.
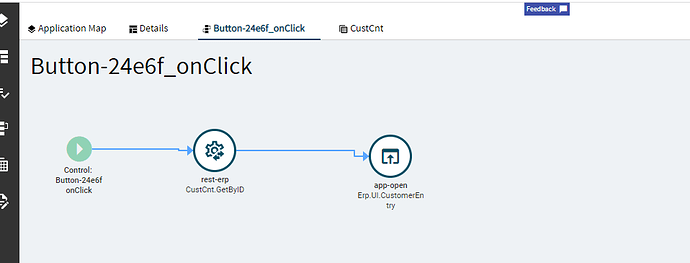
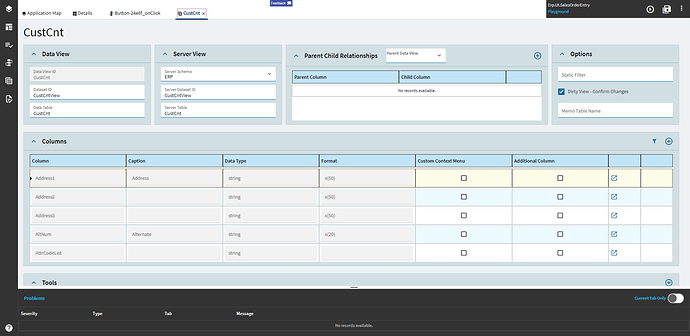
Second–I had it open in a new tab which has its own problems. For one, it doesn’t actually take you to the ContactDetail page. It does, however, pass the contextValue. Woohoo! Sort of. Turns out the PrcConNum in OrderHed is not what you need, so before you call the app-open widget, you’ll need to do a rest call to the Erp. BO.CustCntSvc and GetByID to get the PerConID. (Assuming you’re calling from Order Entry. You never really specified, so that’s where I ended up, but I assume the problem would be the same across the board).
Okay, so now I’m passing the proper ID through the context, but I was getting a CustCnt not found error. But why? So, I moved it to a button click instead of OnLoad, so I can view it in Dev Tools. When I click the button, it sets Contact.PerConID to the contextValue. I look at the network call and it’s passing the correct value, but it’s still throwing an error.
I typed it in manually and compared the call and it’s sending a dataset with when you type it in manually. FFS. So now you have to set that too. Oh–an then you have to use the page-navigate-to widget to make it go to the proper page. Good lord.

**IMPORTANT EDIT: Make sure you create a new layer for Customer Entry that is NOT the layer you use if you go there from the menu. The reason being is because some of the data you’re sending it from the Launch Options makes it work. Without that, it will crash on load. So, if you have a customized version of Customer Entry, make a copy of that to be the version you call in your Launch Options.

Any who… enough ranting, here’s the details:

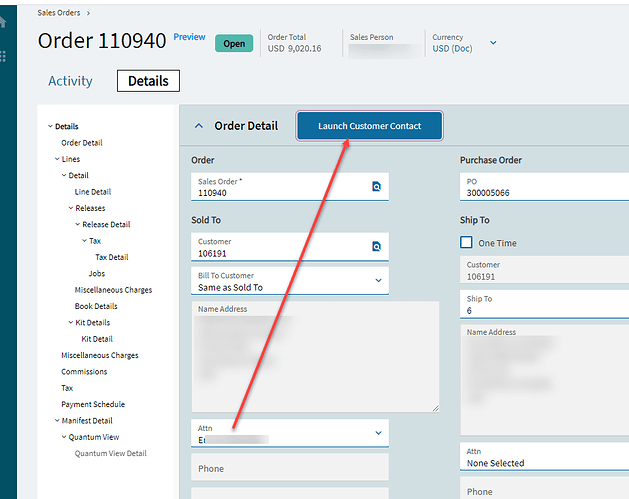
Pushy dah button.

Button click details. Rest > App-Open

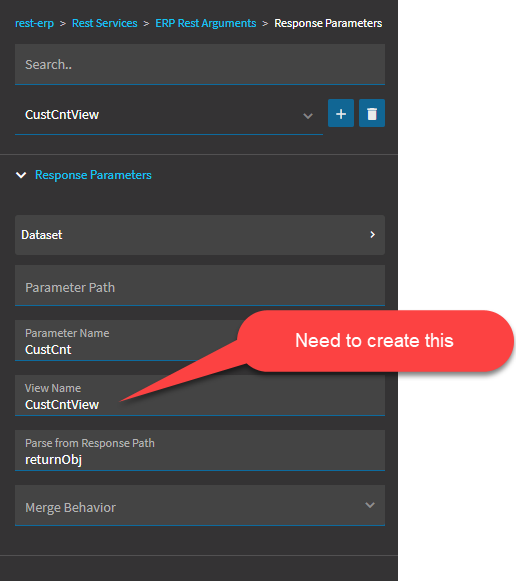
Rest Config:


Create your View that you named above.

App-Open Config

Launch Options:

{
	"options": {
		"valueIn": "{OrderHed.CustomerCustID}",
		"contextValue": {
			"Param1": "{CustCnt.PerConID}"
		}
	}
}

ON THE CUSTOMER ENTRY SIDE

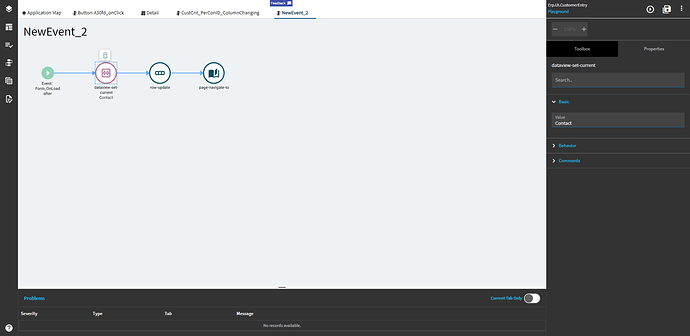
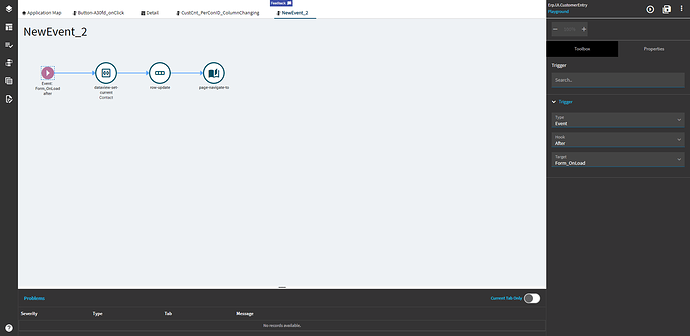
On Load Event

Set the current data view to Contact:

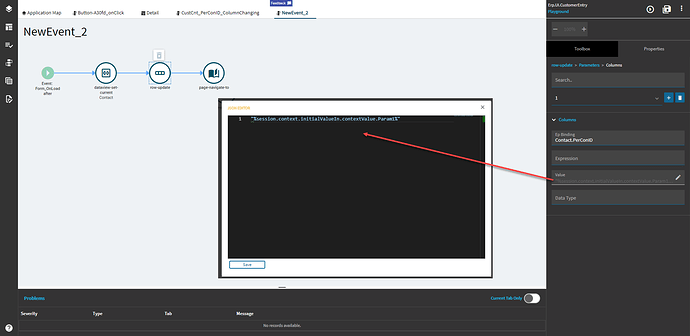
Use Row-Update to set the Contact.PerConID to the contextValue:

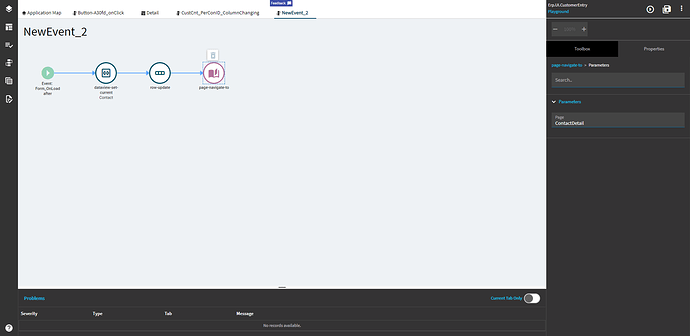
Finally, navigate to the contact page.

Once you’ve done all that… go pour a whiskey because DAMN that was annoying. * Shakes fist at App-Studio *

8 Likes

Wow! Thank you for taking the time to do this. I must say it was hard! Yesterday afternoon I got it working though with a slight different approach. But I Iove what you did. I’ve not used the rest-erp as of now. I think I must try it out…

The way I did it was I sent the value as contextValue in the launchoptions of app-open. Even on slide out, contextvalue works for me.
When I received it on Customer Form Load (Yes, I created a different layer too), I used the row-current-set which I mentioned in my previous post. And voila!

P.S: On a side not, I love your posts. I must say 75% of my Kinetic knowledge is from your posts!!

4 Likes

Yes. I was opening it from Order Entry page too!

1 Like

This is going to very much be a “Who moved my cheese” reply, but damn–I could do all of that in, like, 5 minutes with C#. BAH.

1 Like

Here are some more variations for posterity.

Multiple ValueIns and how to use them

{
	"options": {
		"valueIn": [
			{
				"orderNum": "{ShipDtl.OrderNum}"
			},
			{
				"orderLine": "{ShipDtl.OrderLine}"
			},
			{
				"orderRel": "{ShipDtl.OrderRelNum}"
			},
			{
				"partNum": "{ShipDtl.PartNum}"
			},
			{
				"packNum": "{ShipDtl.PackNum}"
			},
			{
				"qty": "{ShipDtl.DisplayInvQty}"
			}
		],
		"callBackToken": "partbinorder"
	}
}

On the launched form side, hook into some event and use row-update to set your fields to the values using this syntax.

%session.context.initialValueIn.ValueIn[0].orderNum%
%session.context.initialValueIn.ValueIn[1].orderLine%
%session.context.initialValueIn.ValueIn[2].orderRel%
%session.context.initialValueIn.ValueIn[3].partNum%
4 Likes

Yet ANOTHER iteration on the receiving app side.

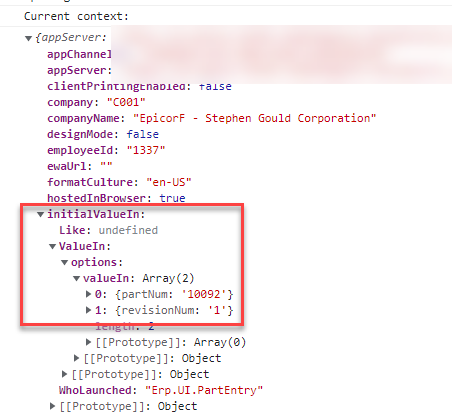
Expression: %session.context.initialValueIn.ValueIn.options.valueIn[0].partNum%

image

Season 7 Ugh GIF by One Chicago


I guess the moral of the story here is to check out the context in Dev Tools in the launched app.
Open Dev Tools and enter epDebug.context in the console to get the image above and then mimic the initialValueIn property to drill down into your context field.

2 Likes

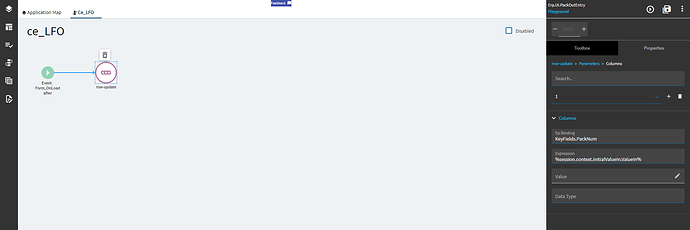
I’m trying to do this with the Pack Out Entry screen (Erp.UI.PackOutEntry). It doesn’t have a landing page and doesn’t seem to want to take the PackNum in the launch option. Is there anything unusual about this form?

Nope.

Create a layer on the Pack Out Entry screen and an event that sets the field on form load.