A popular topic seems to be how to uplift Kinetic dashboards to resemble classic ones.
I’m going to run through and outline the steps I take when I uplift dashboards and will add onto this post with various nuances as I come across them.
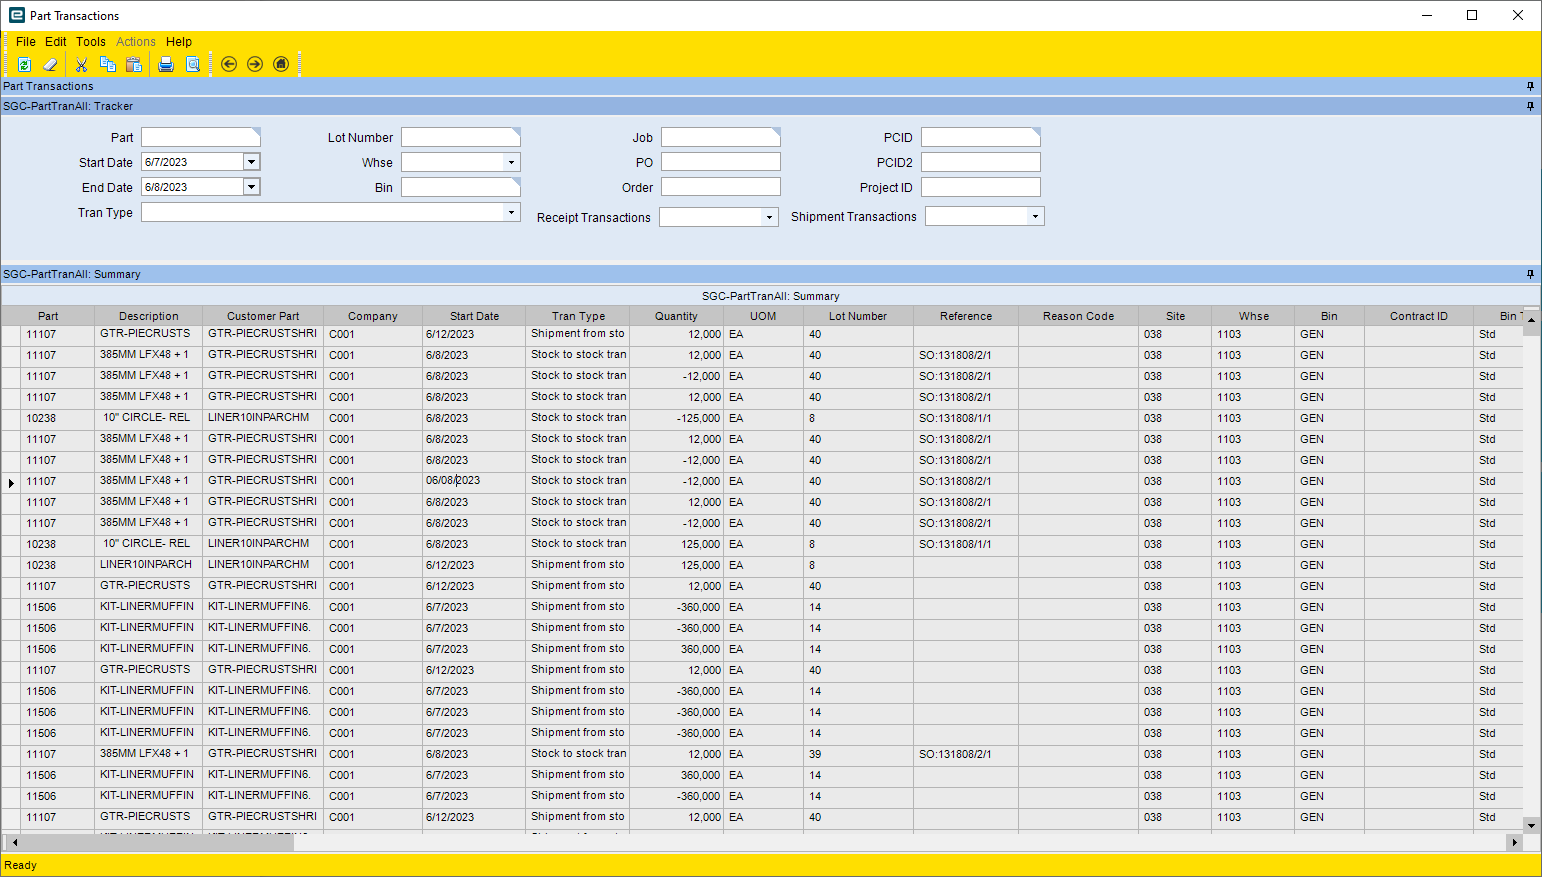
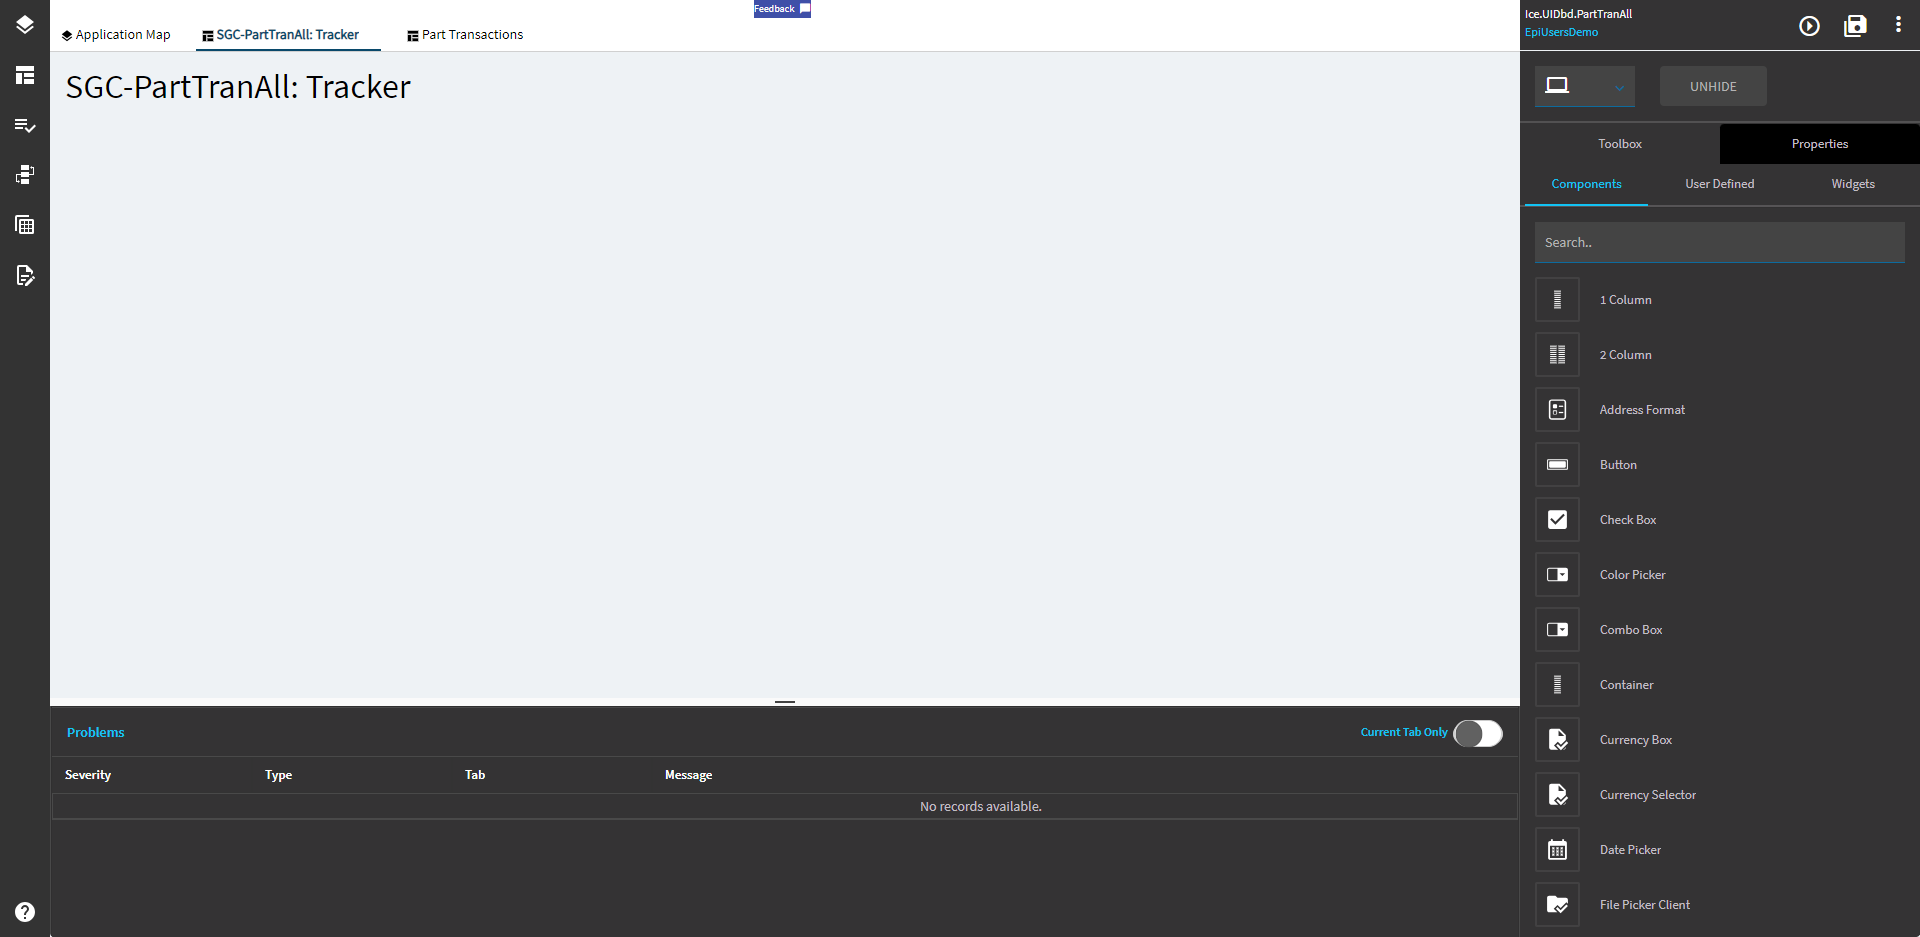
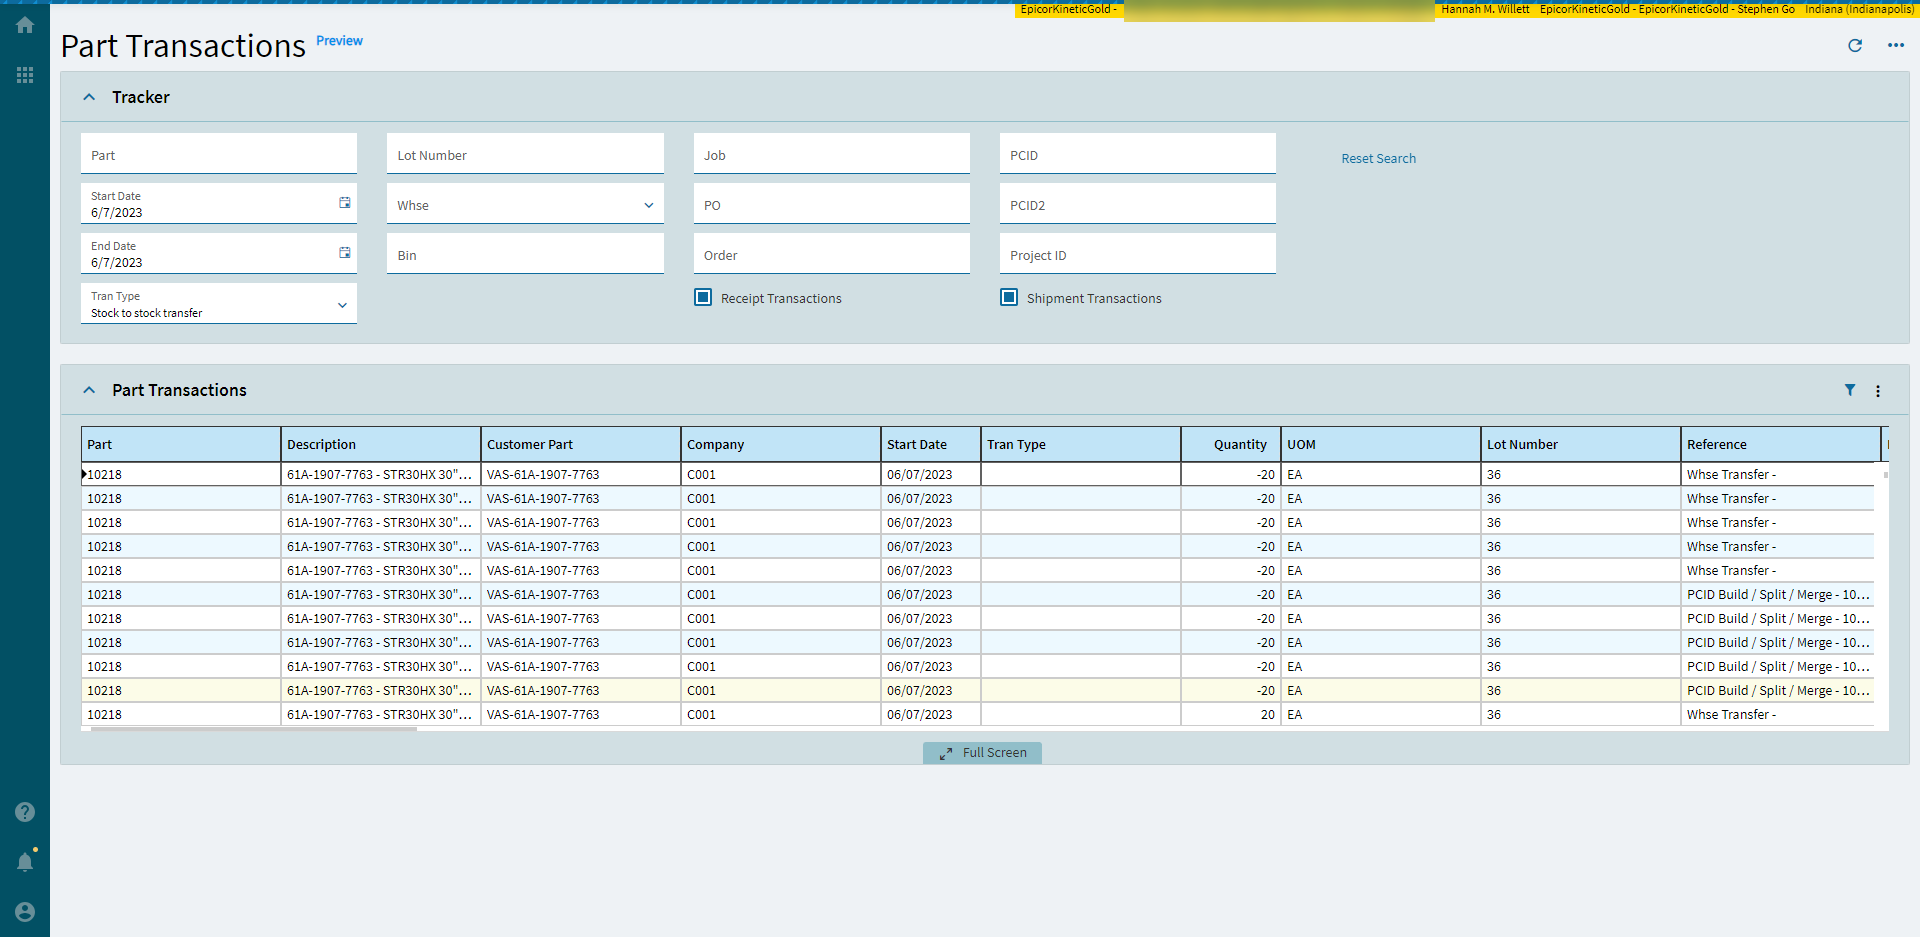
For today’s demo, I’m going to uplift this “Part Transaction” dashboard. It’s pretty simplistic and only has a tracker with a single grid.
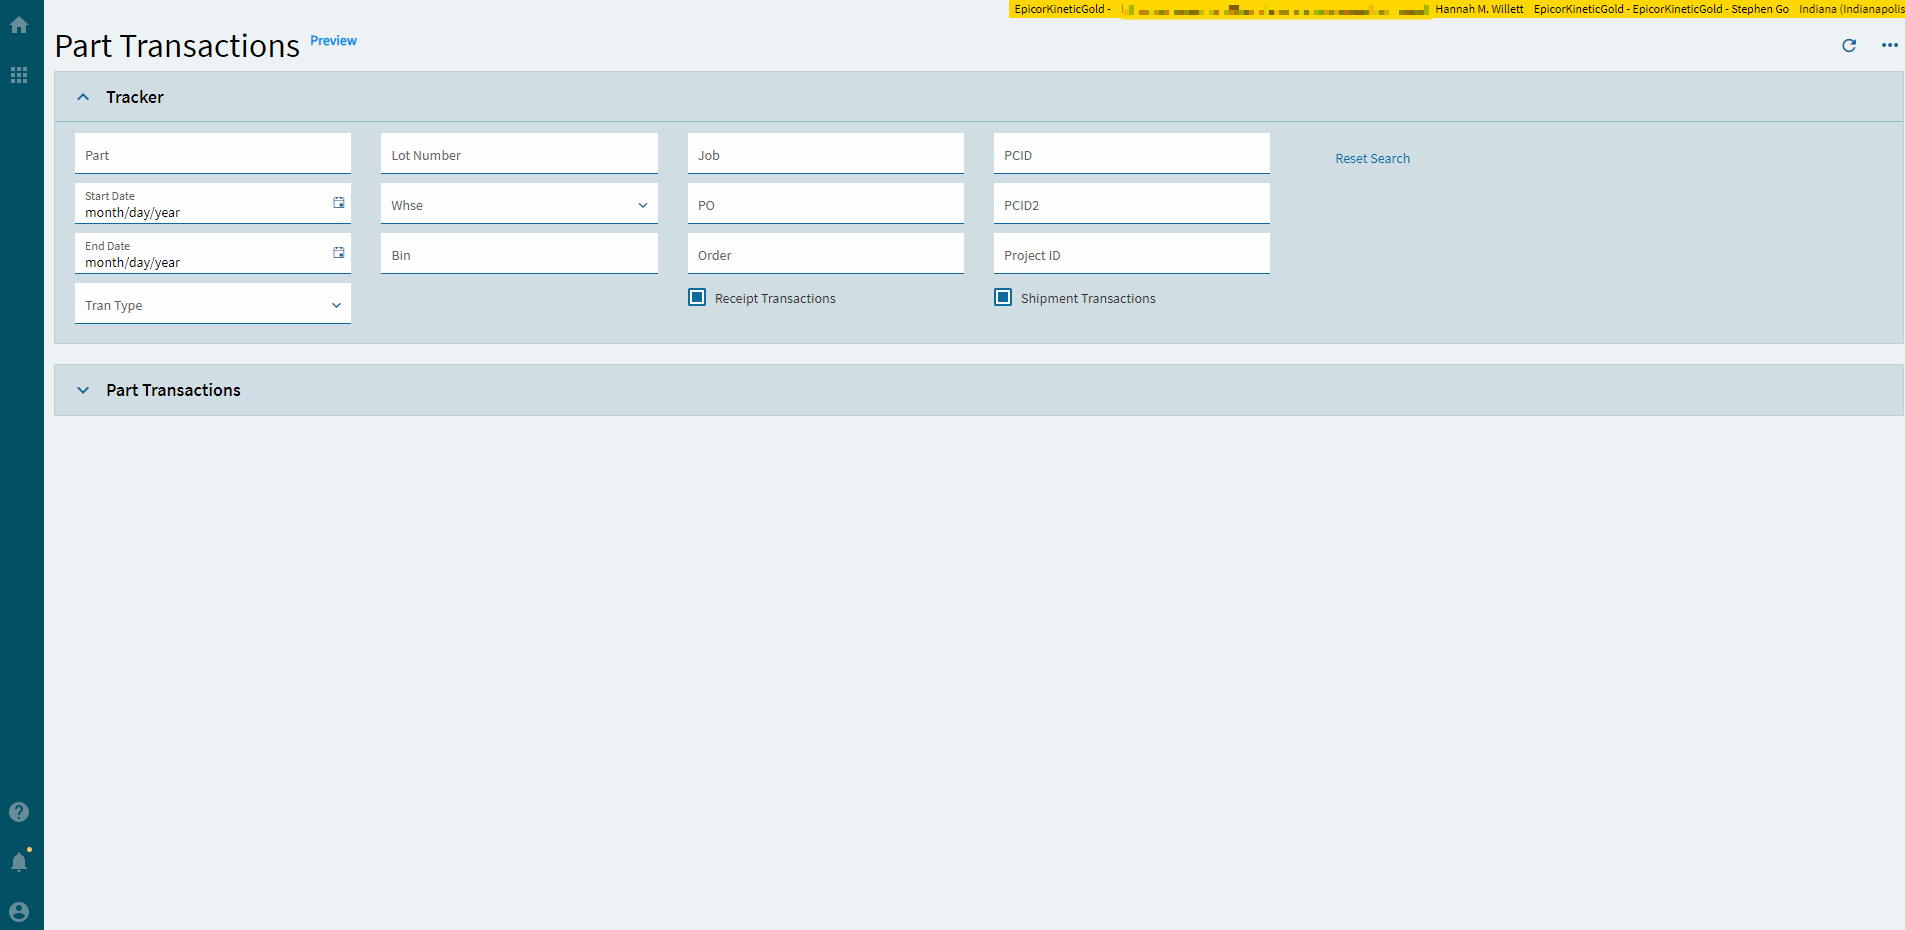
Here’s what it looks like after letting Kinetic do its uplift thang.
Not good. Especially since that search icon is in the overflow of the grid which is inaccessible until I expand the panel which loads… everything. OOF. Not a great thing to have happen with the Part Tran table.

Let’s fix that.
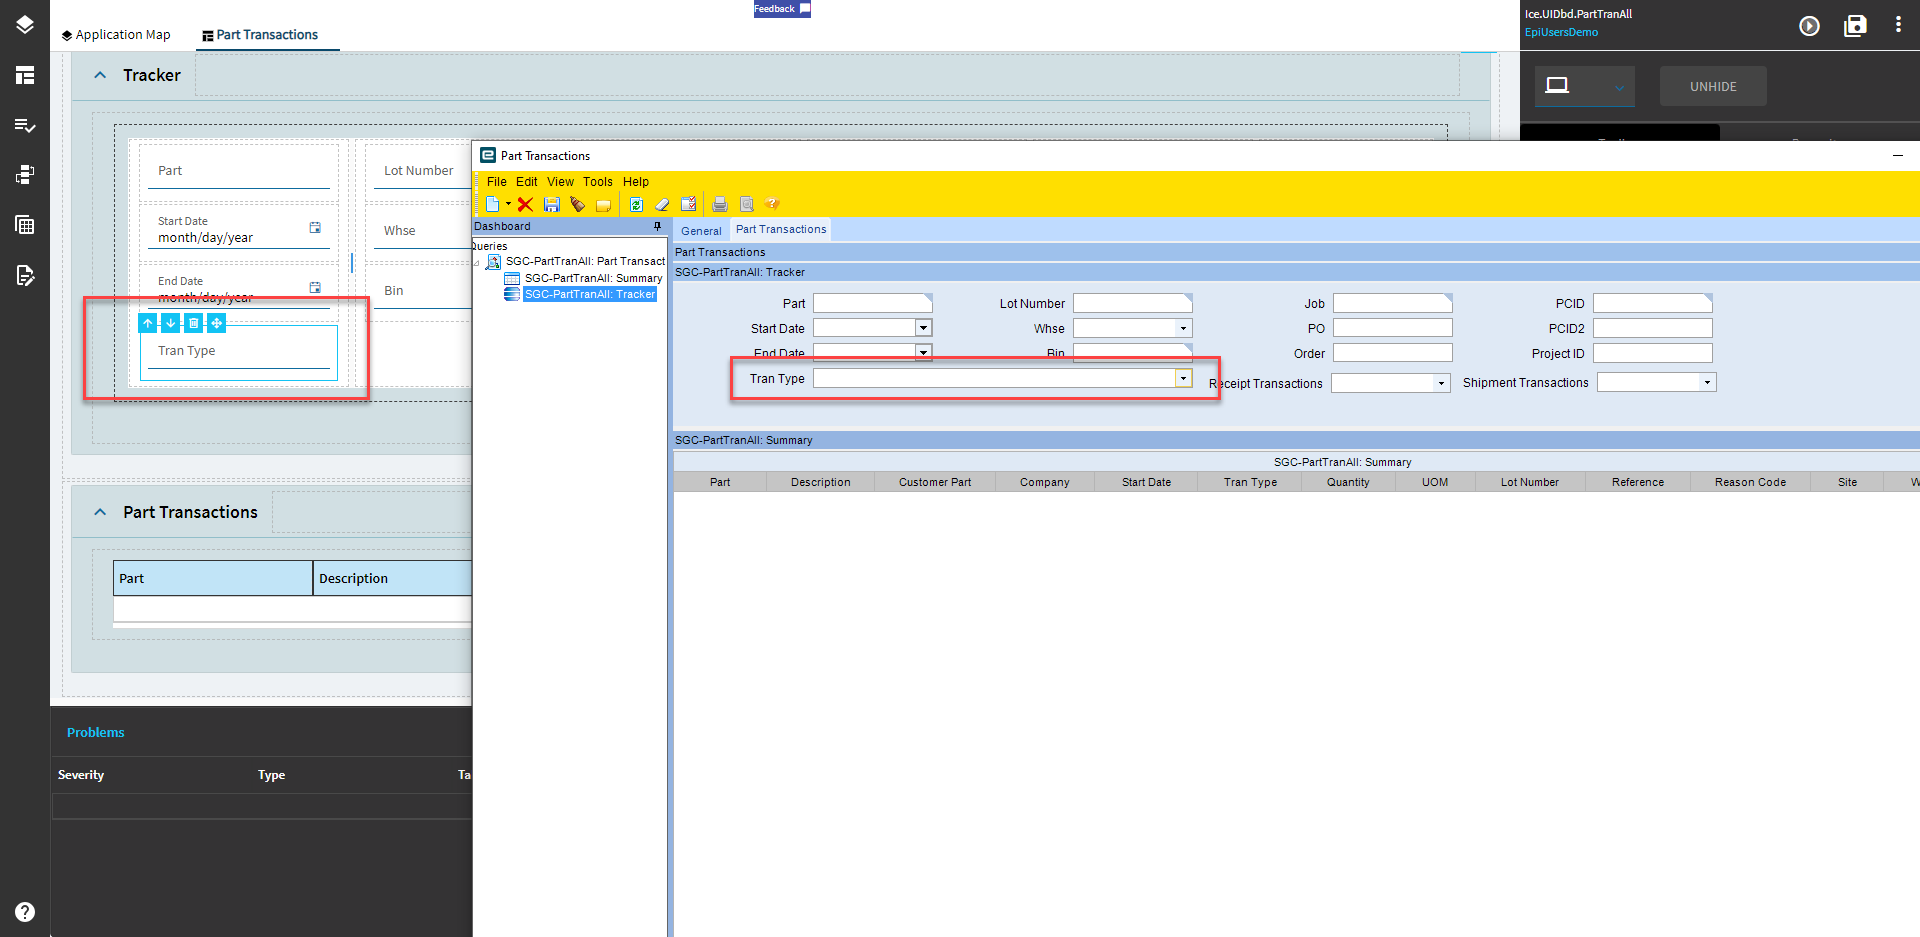
Here’s the layout that it gives me: the grid and the tracker slide-out.

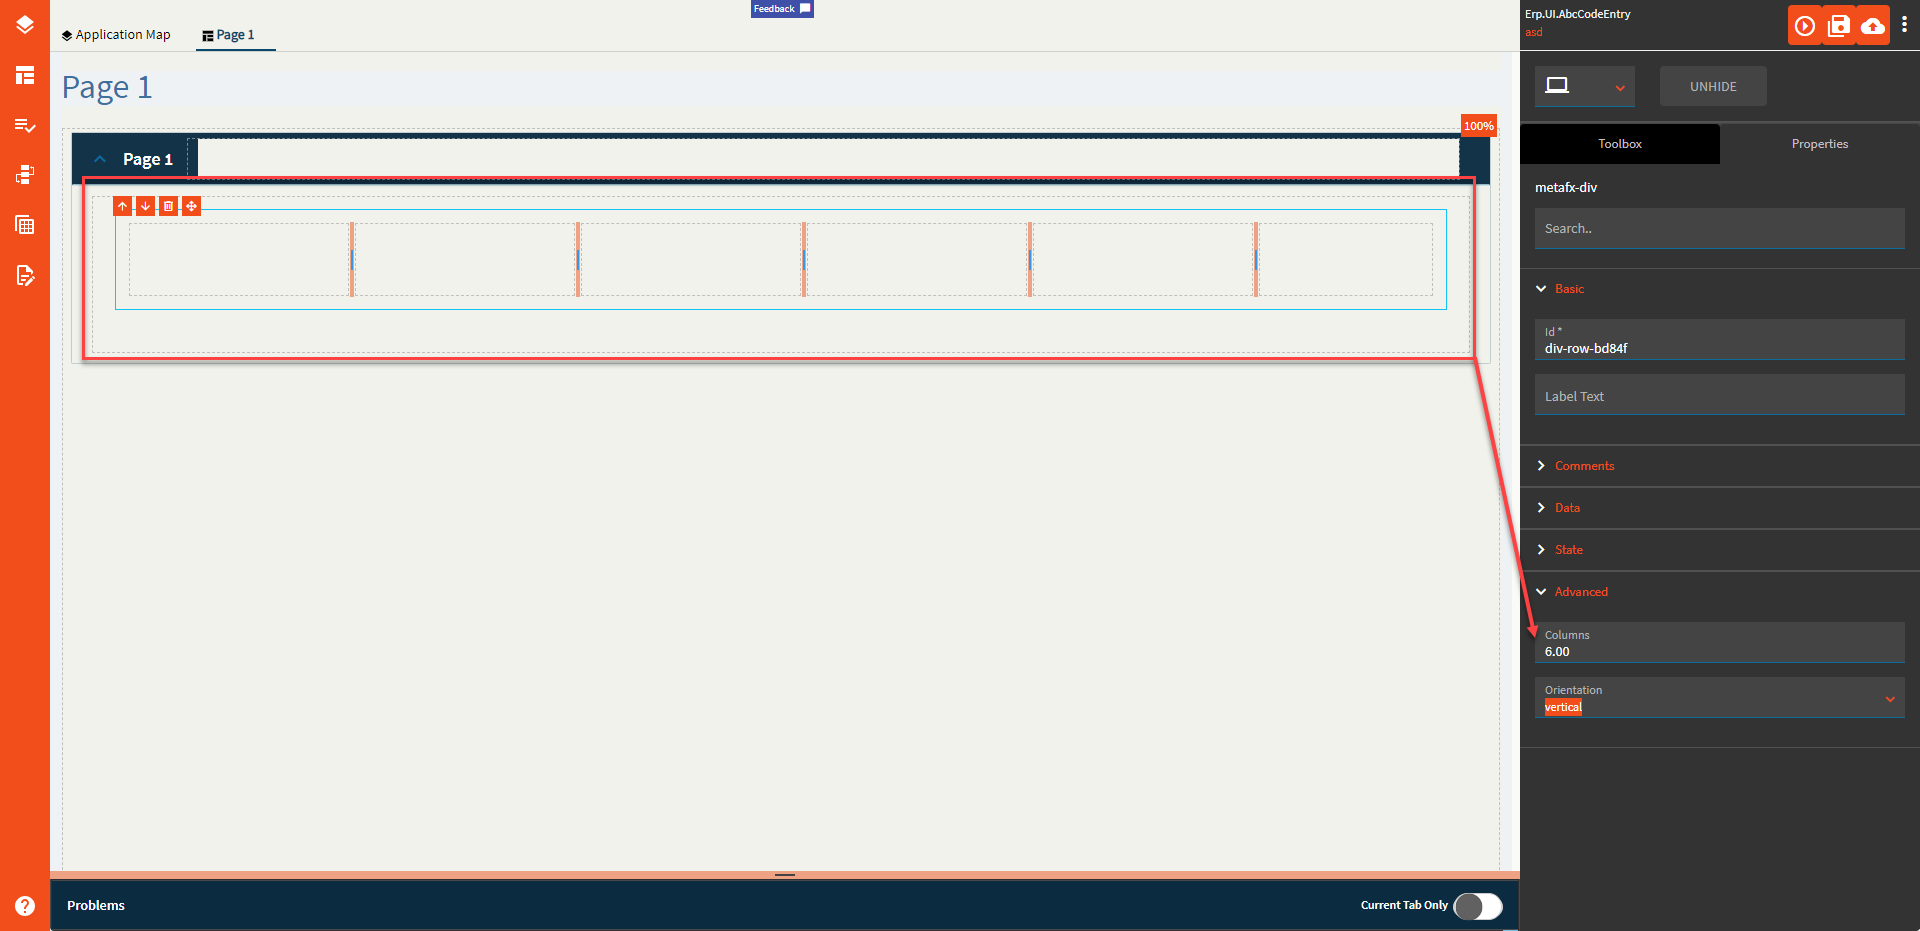
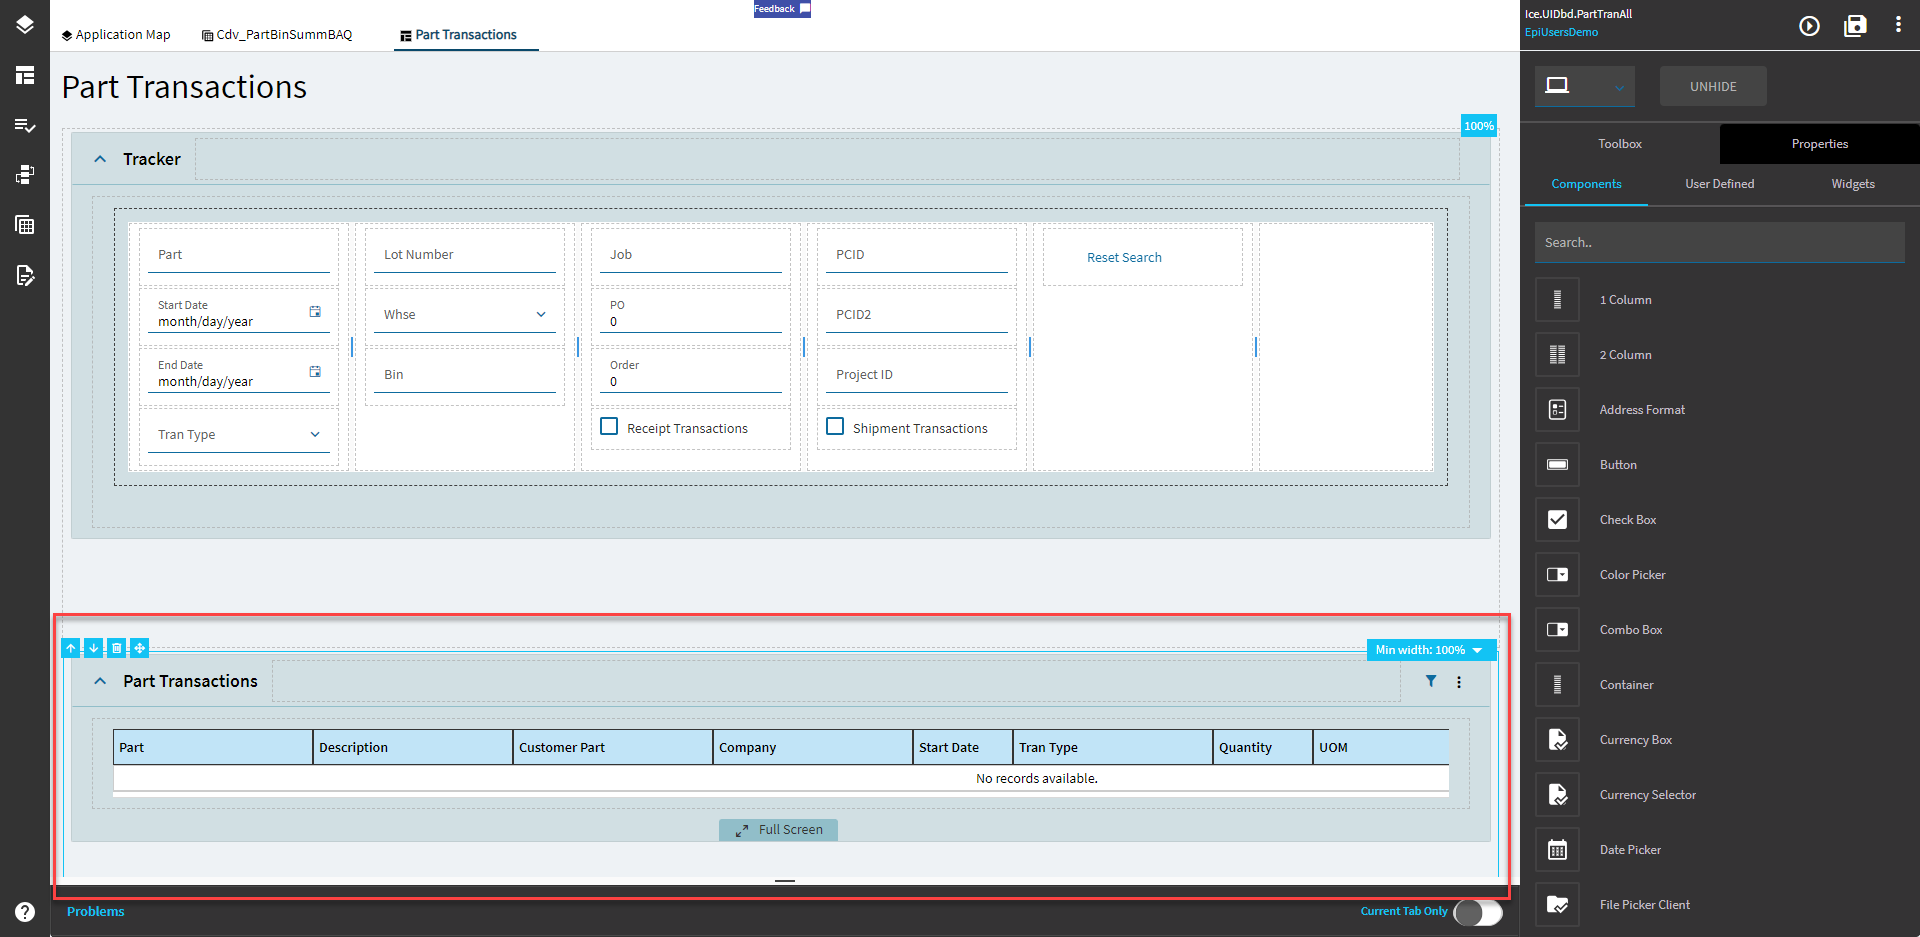
First thing I want to do is add my own tracker panel card to the top of the Part Transactions page and put a column container within (I like 6 columns as it smooshes things together real friendly like).

Next, we’re going to open up that slide-out screen and copy+pasta everything over to the new panel card we just made. (Note–cut/copy shortcuts do work! CTRL-X, CTRL-V for you mouse folks).
If you have any fields that didn’t get upgraded (the ones added from “Customize Tracker View” in classic) then add those now and bind them to the same DataView that the others are bound to. In my example, it would be SGCPartTranAll_0_1.NewColumnName. Note: the column can be named whatever and does not need to exist in the DataView.

Then delete the extraneous containers. Or don’t. Doesn’t really matter as that screen will never be seen again. Note: Do NOT delete that slide out page. I’ve done so in the past with bad results. App studio did nooooot like it’s friend being removed, so just leave it hang out there in isolation like the bad page it is.
You can see all of the slide-out fields placed neatly in my column layout (don’t forget the poor search reset button!)
Go ahead and click on the panel grid and go to Properties > Action Data
Delete that btn_search_XYZ item as we don’t want the users clicking the search icon and pulling up a blank, useless window.

If you did not add any new fields, you can skip this step.
For those of you that did, we need to make the BAQ aware of the new filters.
Click the grid and go to Properties > Data > Grid Model > Provider Model > BAQ Options > Where List and add each new column.
Column is going to be the name of the column from your BAQ (PartTran_PartNum)
Condition is specified as one of the following: =, <, >, <=, >=. <>, starts, contains, ends, matches
Value is going to be your data binding with a few special characters. Enclose your binding in curly braces {SGCPartTranAll_0_1.PartTran_PartNum}. If it’s a string, wrap it in single quotes. Then add one or two question marks. A single question mark means that a REST request to execute a BAQ will only go through only if the value is NOT empty or null. Two of them means that it will execute even if the value is empty or null.

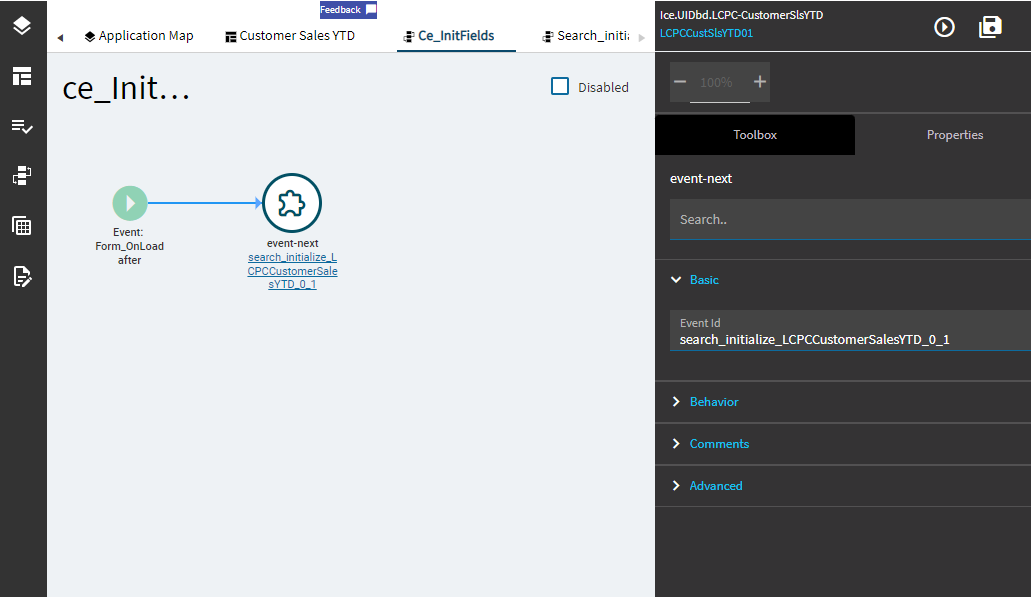
Next, we need to initialize those tracker fields since we’re no longer clicking a button to do so.
Copy the name of the native search_initialize event.
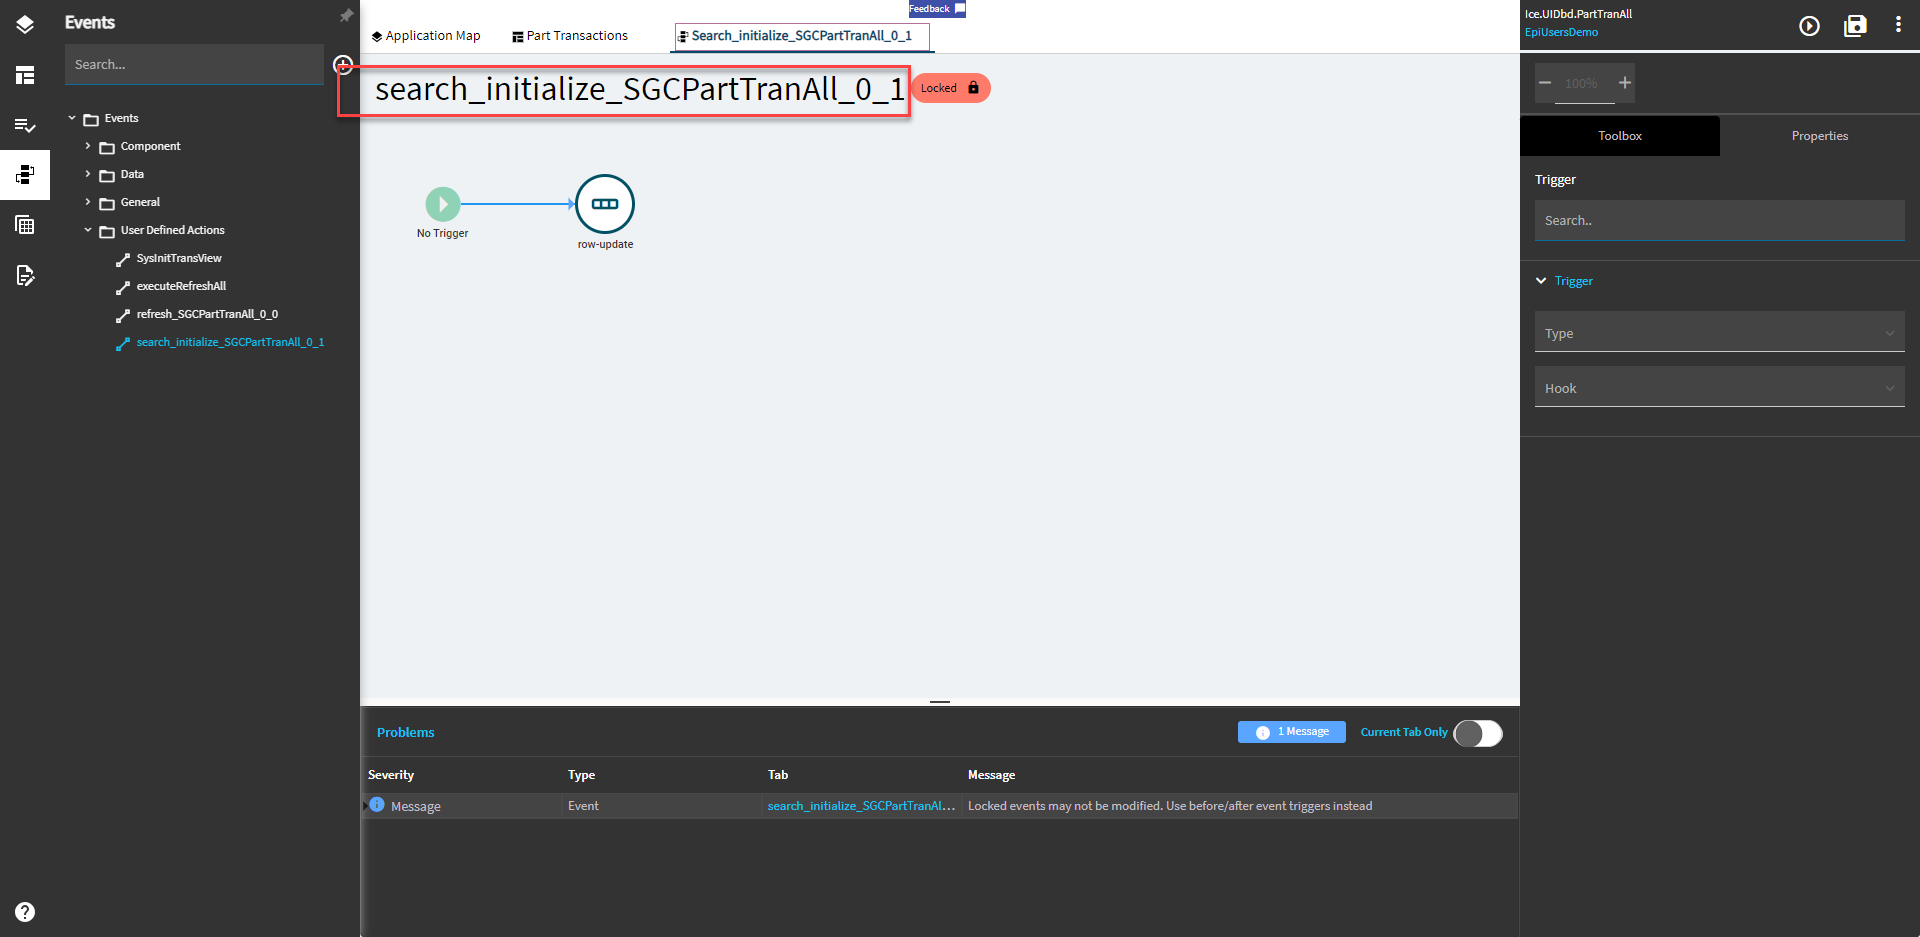
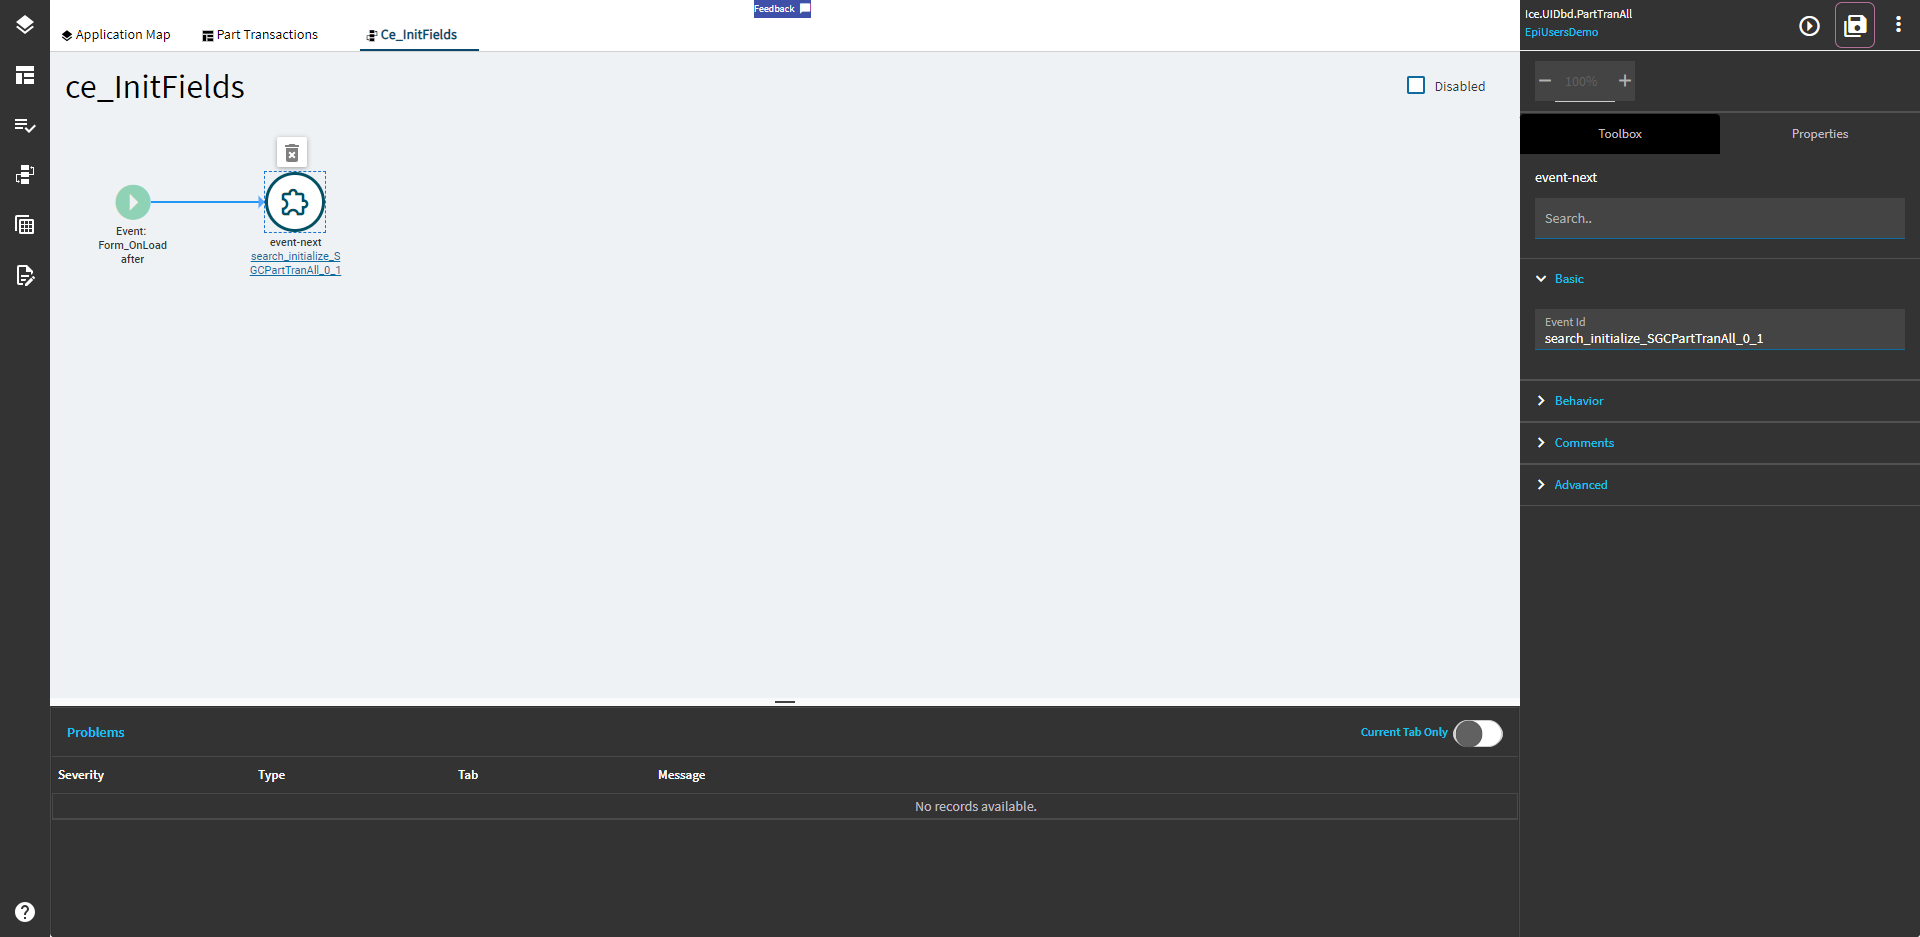
Create a new event with a trigger of Event/After/Form_OnLoad and add an event-next widget and set it to that native initialize event.
Save it and put data in each field, then click reset to see if it clears.

You may notice the date fields do not. Lovely. Hope that gets fixed in the future. Until then, we need to add another event to handle this. This is also the time to initialize any fields that were added in previous steps.
Add a new event with the trigger of Event/After/NativeInitEvent and add a row-update widget. Set any date field and any field you added to this and set it to its respective empty or null value. Text gets an "", numbers get 0, and dates/checkboxes get null.

Nuance! Sometimes the upgrade gets confused (poor thing) and changes combos to be text fields.
'Kay. Let’s fix that. Copy the binding of the text field.

Then set up your combo and set the Data > EpBinding to the binding just copied and then delete the old text box.

Better.

Save it and preview and you should have your dashboard that functions like old!
* Note–the property-set widget to expand/collapse a panel grid seems to be broken right now. If it weren’t, you could add an event on panel card expanded to check if at least one tracker field is populated. If not, throw an error message and collapse the panel via property so that it doesn’t execute a massive query unfiltered.
Use a rule at your own risk. I found that if you use a rule to set a panel as disabled if the tracker fields are empty, then it just… stays disabled. Forever. Even after you disable or delete the rule. I published my dashboard before trying that, so I was able to fix it in SQL by setting SysCharacter03 equal to Content.
Alternatively, you could remove the provider model binding, set the binding on the grid model to be that SGCPartTranAll_0_0 view, add a button to the tracker that says “Retrieve”, and then add an event that calls the BAQ and populates the corresponding, bound dataview. You can set your “input required” check on the button click just before the baq-erp call and cancel if none are found.
Some things I’ll add eventually:
- Side-by-side panels
- Tabs
- Pub/Sub
- Url-Open (for website goodies like Google Maps or whatever)
Charts are another story. They don’t have a convertible chart widget, so you either have to use GROW or Data Discovery. I don’t have GROW, so I cannot speak to it, but EDD suuuucked.
I have been toying with the idea of making a web app to hold the chart and display it with the url widget.
Updates
Pub/Sub and Tabs
Okay, so here’s the pub/sub stuff and tabs in one. I went and found a part-related BAQ for this.
First, let’s create a new DataView to hold the BAQ schema.

Go to the Application Map and add a new page.

Copy+Pasta this bad boy outta here and onto the new page you just made.

Add another page, in the same way, for the new BAQ.
Add a panel card grid and go to the Properties > Data > Grid Model > Provider Model and set the EpBinding to the DataView you just made and set the BAQ ID to whatever query you’re using.

Go down into the BAQ Options > Where List and add the “subscription”.
Column is going to be from your new BAQ, set the condition, and then the binding is going to be from your publishing grid. In this case, it’s whatever my Part Transactions grid was bound to (SGCPartTranAll_0_0). I used a single question mark because I don’t want this dumping the world if it receives a null value.

Go back to your top-level screen (where you removed the initial grid from) and add a Tab widget.

Select the tab then go to Properties > Data and change the default to your first tab page.
Set the unique ID (can be whatever) and the title, then at the bottom, select the appropriate page; this will be one of your tab pages.

Hit the (+) and add your second page and set up in the same fashion.

Repeat as needed.
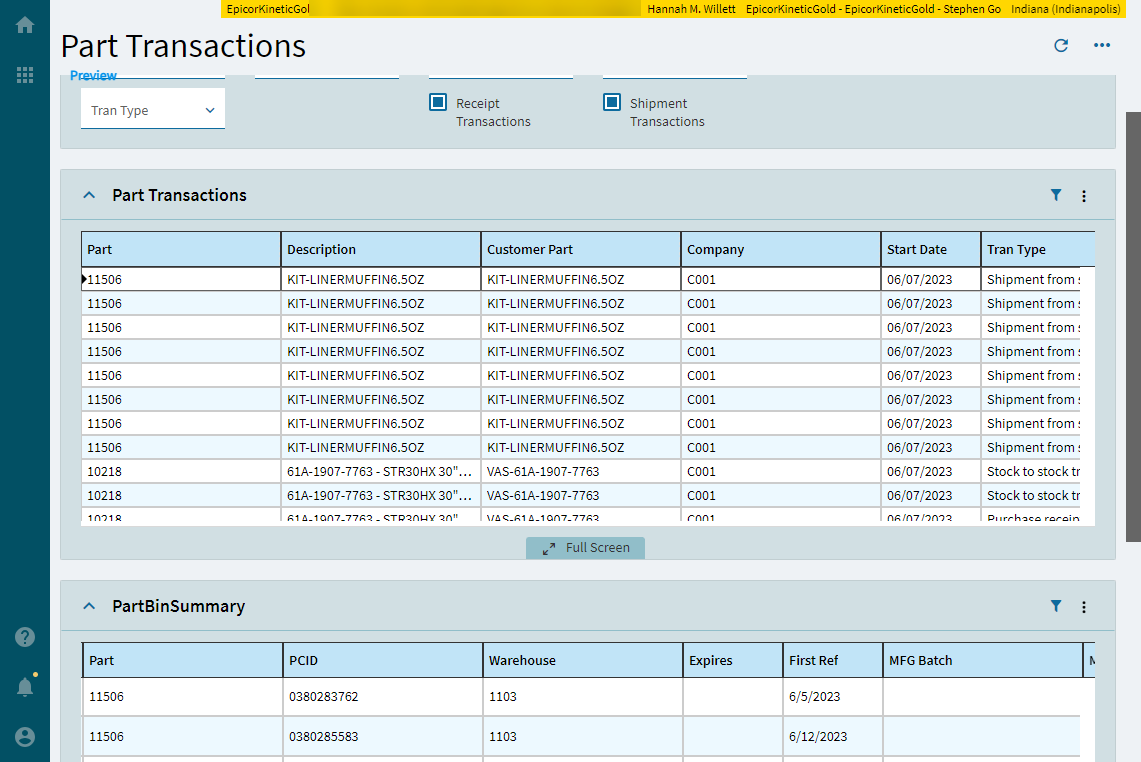
When you preview, you can see tab one where I have part 11506 selected.

When I open tab 2, it filters based on that published value.

Side-by-Side Grids
Using the same two grids (Part Transactions and Part Bin Summary), I’m going to set these up in a familiar side-by-side fashion. This is actually incredibly easy.
Make sure all of your cards are on the same page.
Then, there’s a blue 100% at the top-right of each panel. This is the minimum width it will take up and the screen will flex to adjust for that (where possible).
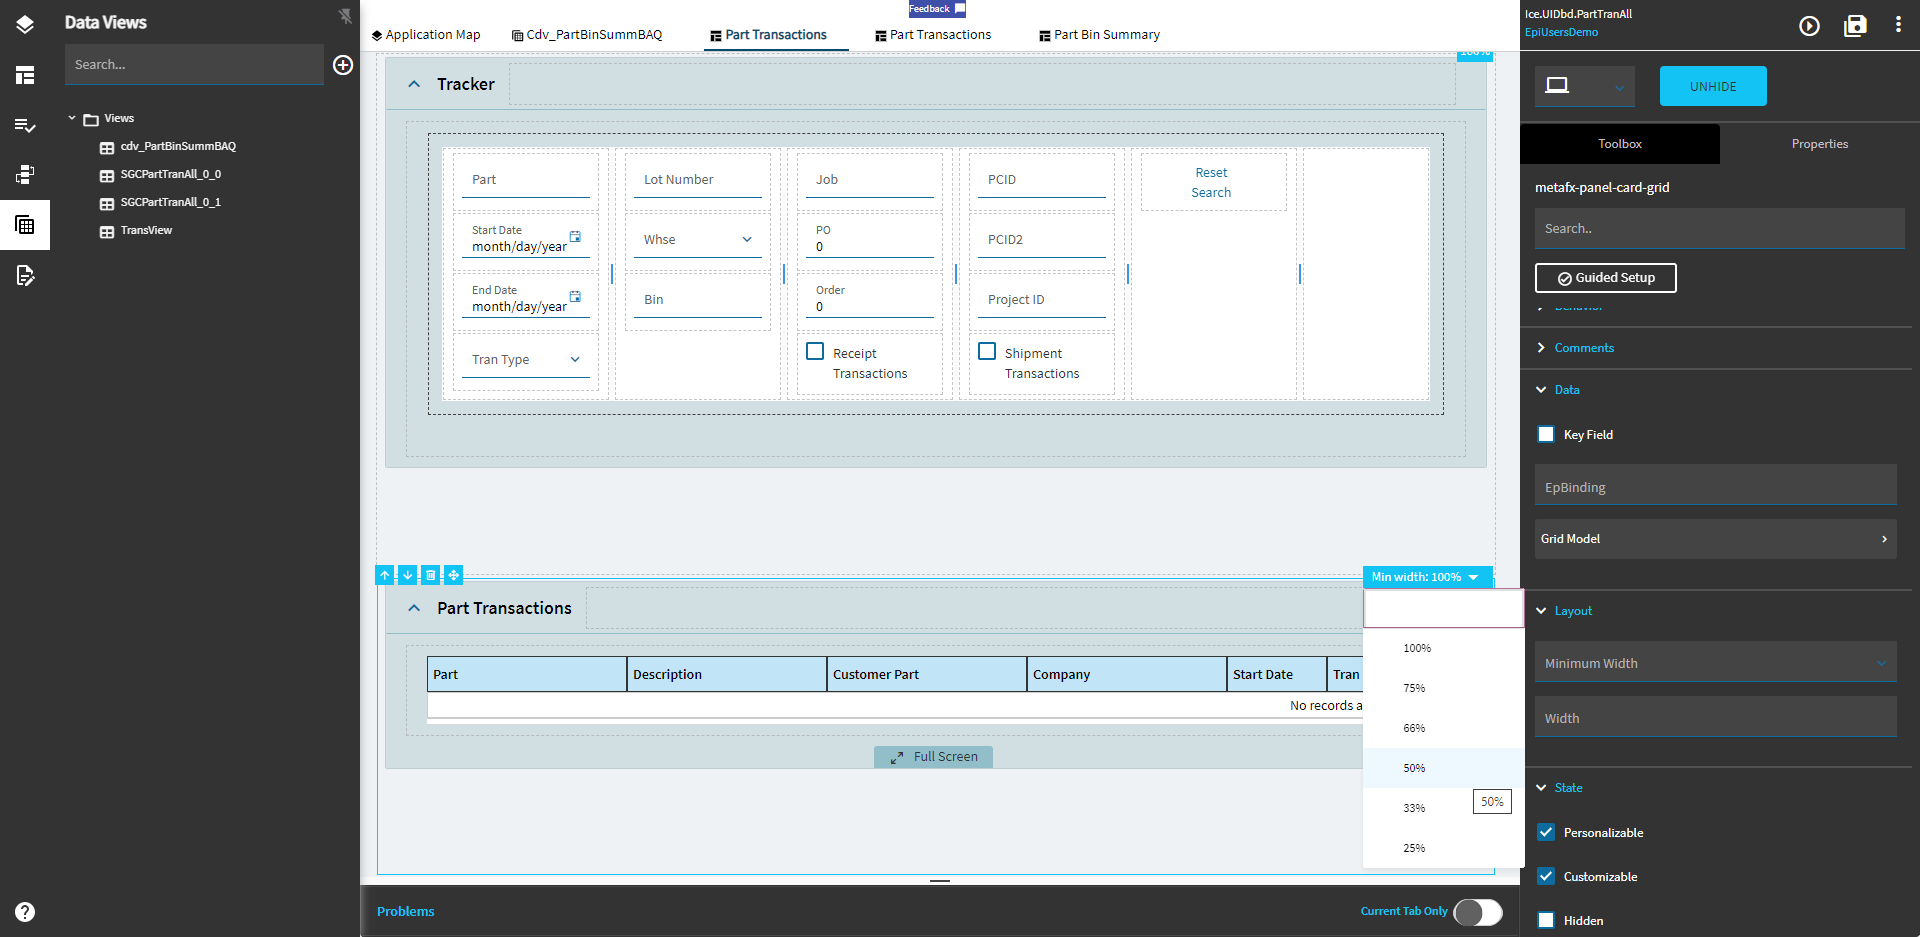
Set both to 50%.
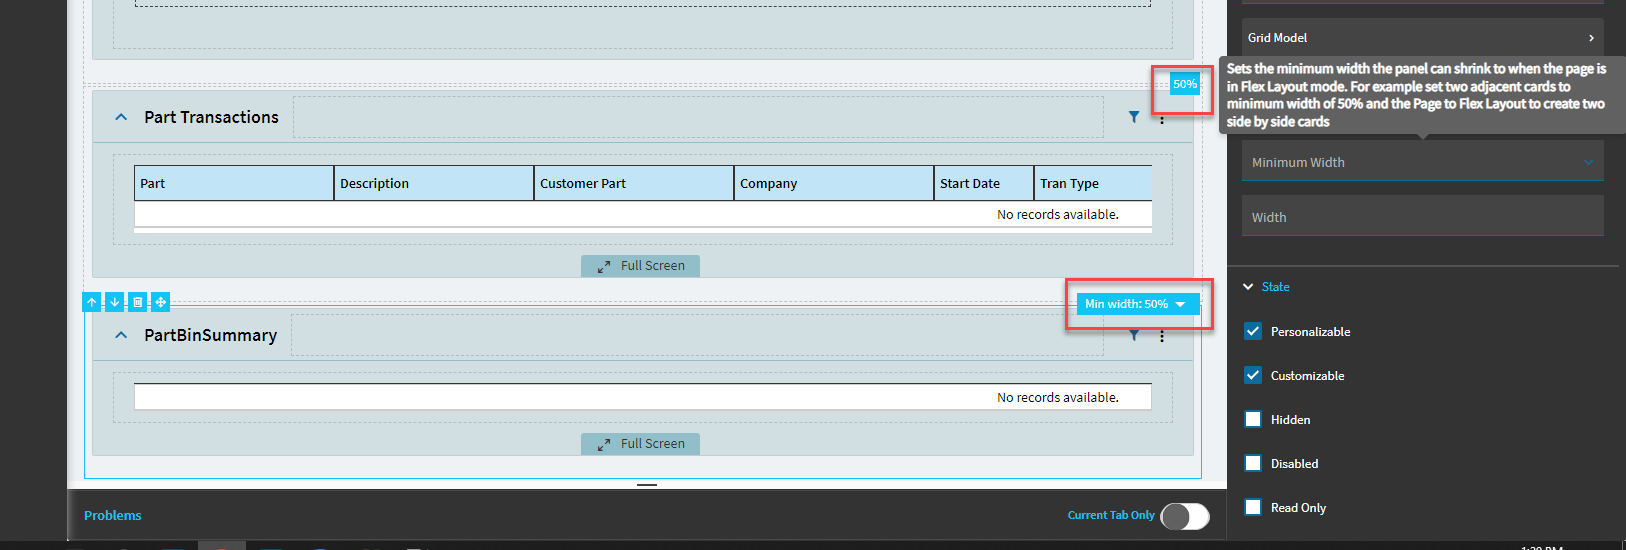
You’ll get some nice, side-by-side grids that will flex back into stacked cards if it scales too small.

Website Widget
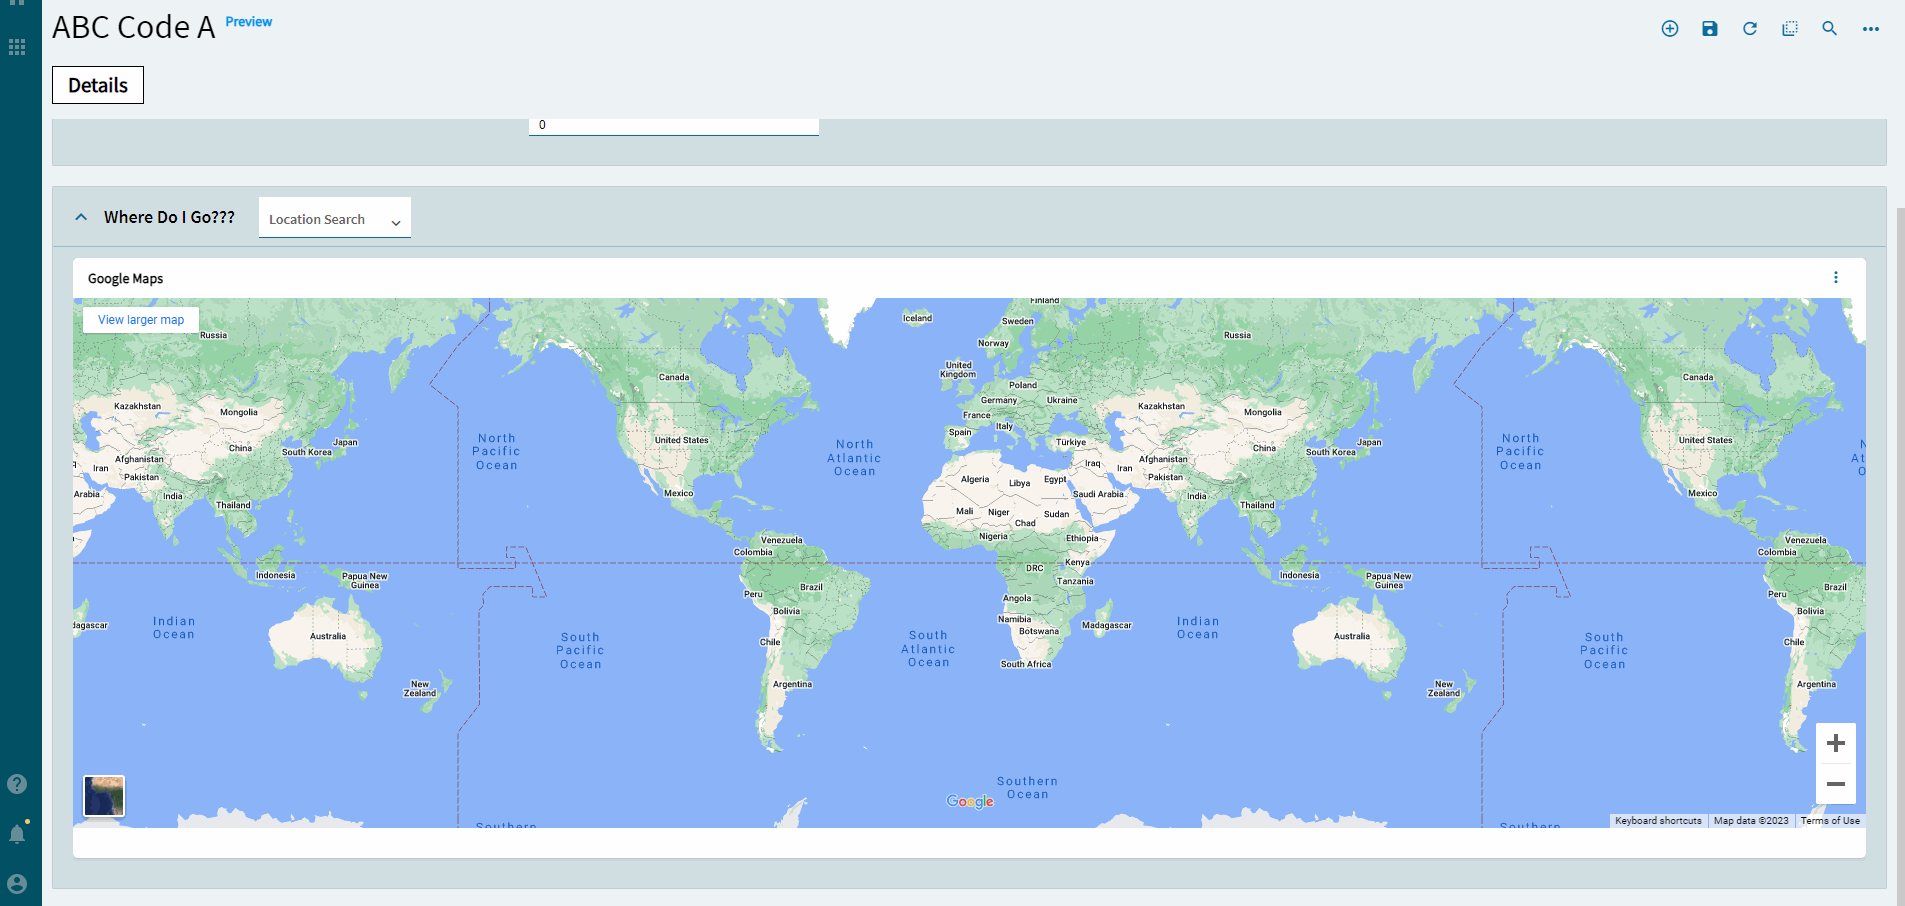
Okay–I was lazy here and didn’t want to create a BAQ with addresses and whatnot, so you get ABC Code and a combo. DEAL WITH IT! ![]()
Pretty much the same principle, though.
Okie-doke–first thing’s first, add a panel card with a single column in it.
I added a combo box with address and keywords for example purposes and bound it to TransView.Address.

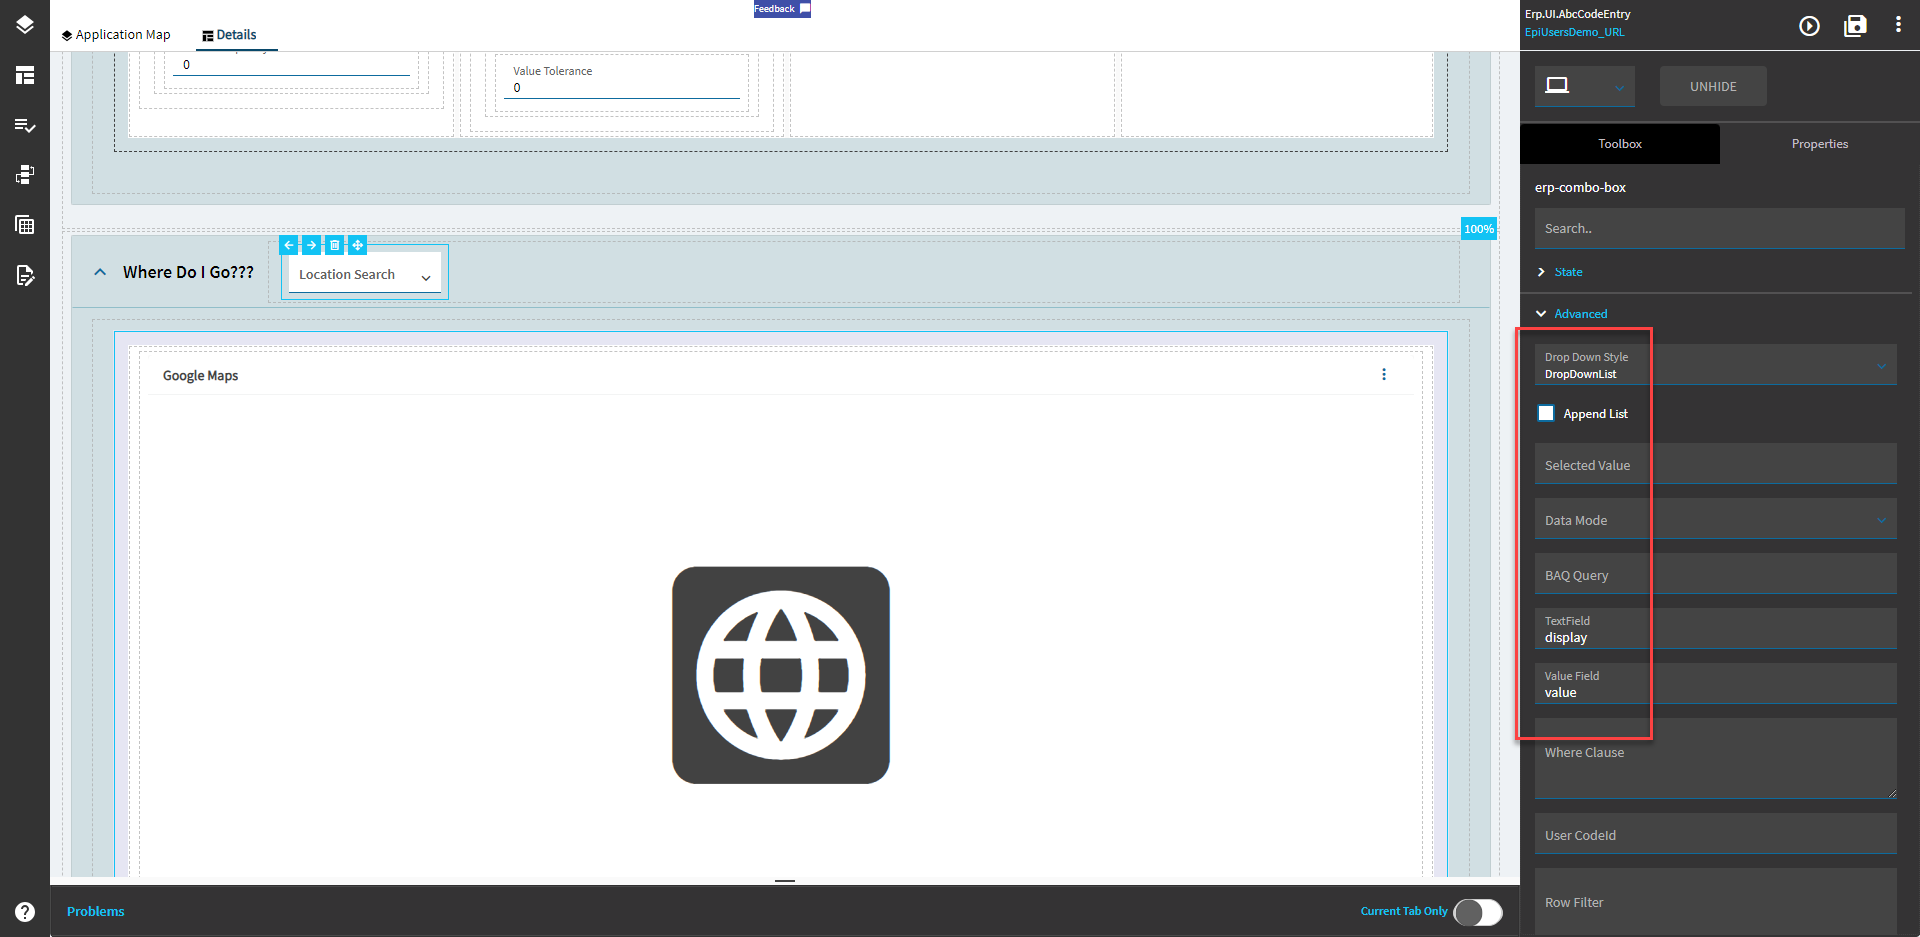

Then, within that column you added, add a Website Widget, but make sure you choose correctly!
“WebSite Widgit Control” (Yeah, it’s even spelled incorrectly) under Components = ![]()
“Website Widget” under Widgets = ![]()

It’s up in the air what the difference is. I’ve asked around and it was speculated that one is internal and one is external, but I don’t think that’s entirely true. Any who–use the Widgets tab one!!

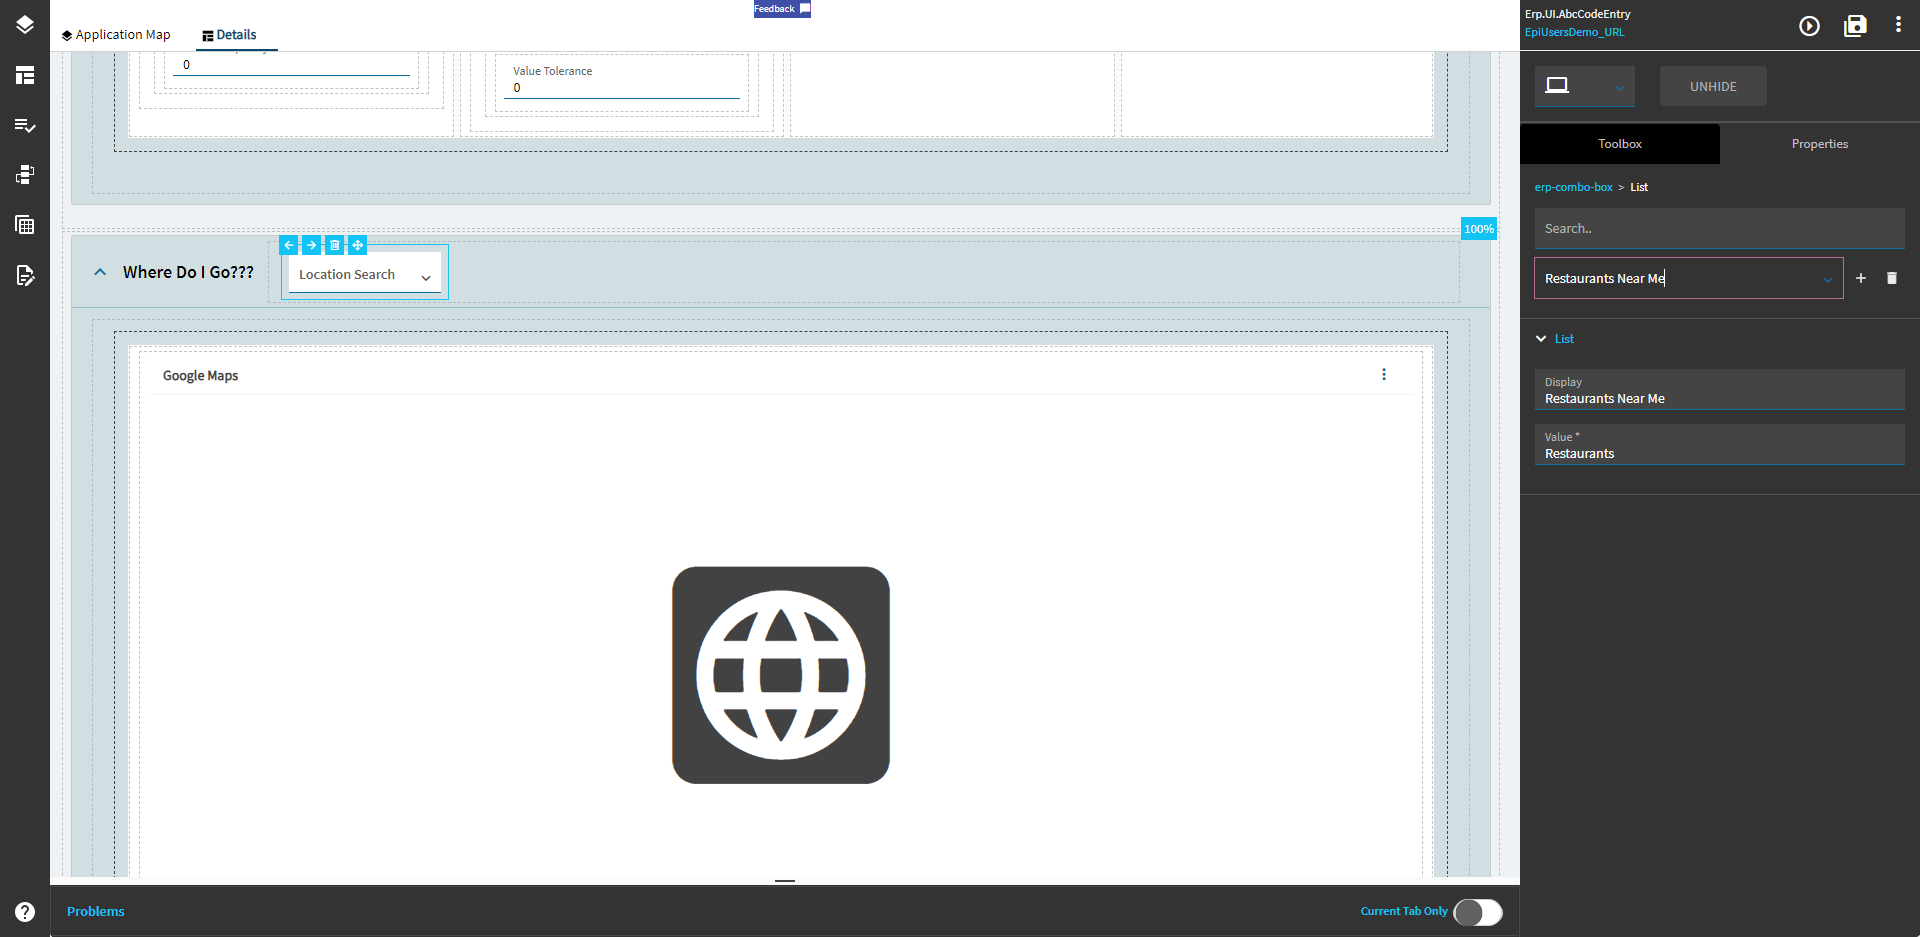
For the URL you can add something like the following: https://www.google.com/maps?q={TransView.Address}&output=svembed
Note: Google will puke if you leave off the &output=svembed on the end since it’s its X-Frame-Options is set to sameorigin.
And then you get some magic. Weeeeeee.